Here’s my philosophy on vegetable gardening: I’m more interested in growing interesting and delicious food than I am in getting very high yields or never having to deal with a bug. In other words, organic is important to me. As you know, I’m all about encouraging people to do what they want in their own gardens, but for me, organic is the way to go.
And that’s why the decision about what material to use to construct my raised beds was important to me. If I’m going to go to the “trouble” (although honestly, since I’ve never grown vegetables any way other than organic it doesn’t seem like trouble, it just seems like how you do it) of growing my own organic food, I don’t want some creepy chemical leaching into my soil. And that’s why I chose to use cedar and untreated pine to construct the garden beds. Obviously using all cedar (or redwood) would have been optimal, that would have tripled the cost of building the beds, so we only used cedar for the first course where there would be ground contact. I also opted against using pressure-treated wood, even though it is said to be safe to use in such an application.
We built our first raised garden bed out of untreated pine with cedar posts and did nothing to protect the pine. It succumbed to very bad rot after eight years. I’d like to get more time out of these beds.
There aren’t a lot of treatment options available that meet my food-safe requirements. Raw linseed oil is one (but not boiled, which contains solvents to help it dry quicker). The problem with raw linseed oil is that it is very slow to dry and it’s difficult to find information on how effective it is.
I had almost given up hope on finding something until I came across a company called Timber Pro UV in Portland, Oregon. This family-owned company has been making “green” wood coatings that don’t rely on petroleum oil derivatives since 1996. I was most interested in their Internal Wood Stabilizer, which is said to be safe for use in many applications including garden beds and chicken coops. Here’s how it works, according to their website: “IWS absorbs and a chemical reaction occurs when it combines with the free alkali that exists naturally in wood.A waterproof gel forms deep within the pores. The gel hardens to hard silicate-like glass crystals which remain permanently imbedded deep within the wood which becomes so dense it can absorb little to no water. IWS does not wear off, never needs re-applicationand does not attract dirt and spores.”
I don’t pretend to fully understand all that, but the reviews I’ve seen online seemed positive. And then I called the company and talked with one of the owners for about 45 minutes! I asked tough questions, she provided great answers and the product’s safety data sheet reinforces the information. Timber Pro also very nicely offered to send me some to try.
The product is very thin, with a waterlike consistency. I used a brush to apply two coats (with drying time in between) on the bottoms of the cedar layer, the side that would be touching the ground. Then, after the beds were built, I did two coats on the insides. The best method of application was a pump sprayer, which allowed the wood stabilizer to get in the cracks between 4-by-4s. The wood stabilizer, however, will not allow anything to penetrate the wood once it’s dry, so I had to tape off a lip on the top board so that I could go back later and stain that.
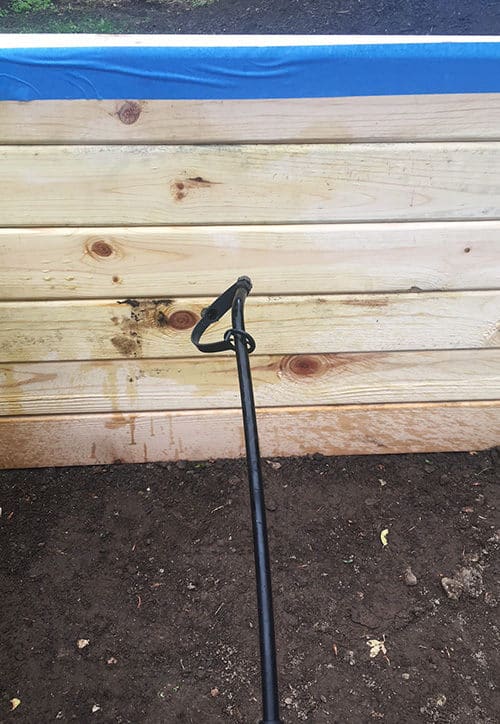
When I removed the tape after two coats, the wood was a different color, so it was easy to see where I had treated it and where I hadn’t. And that’s all there was to applying it. I was really thankful for one very quick step in this drawn-out process of creating these gardens. One three-gallon bucket covered everything in two coats exactly.
Unfortunately, that’s all I can tell you about it, because the proof of this product’s effectiveness won’t really be known for several years. I have great hopes for it. Check back in eight years for an update!
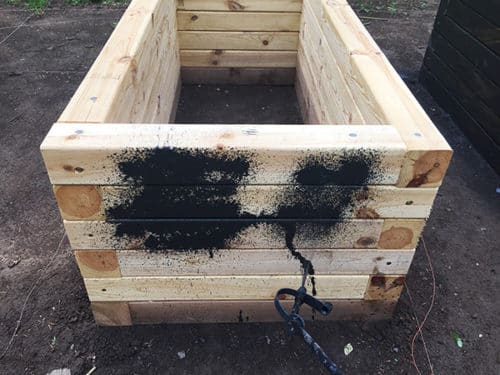
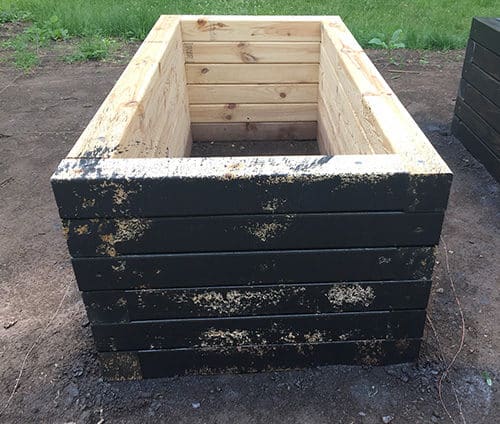
After the beds were treated with the wood stabilizer, I turned to the exterior of the beds. Although I like the silvery look of aged wood, I thought black stain would be really sharp. For this I used Timber Pro’s Deck & Fence Formula, which is a waterborne, plant oil-based (not petroleum oil-based) semi-transparent stain, in Ebony. After doing two beds with a brush, I realized it was going to take a long time and I felt like I was using a lot of stain, so I revisited the directions. Funny what you find when you actually pay attention to the direction! Turns out that the pressure sprayer was also listed as an option for applying the stain. Once I got that dialed in, spraying one side then immediately back-brushing, things went quickly. After one coat it was quite transparent and looking a little greenish gray when it dried, but after the second coat it was a deep black that still allowed the wood grain to come through. Exactly what I was looking for.
All of the usual prep to staining is required for both the staining process and the internal wood stabilizer application. The wood had to be clean (I just dusted off the sides with a brush since this was all new wood) and, most importantly free of mill glaze. You know how when you get some wood it’s sort of shiny? Turns out that’s from the resins in wood melting against the heat of a saw blade and it can prevent products from penetrating the wood. We got great wood from the local lumber supplier and it was almost all free of mill glaze so very little sanding was required. Win for me!
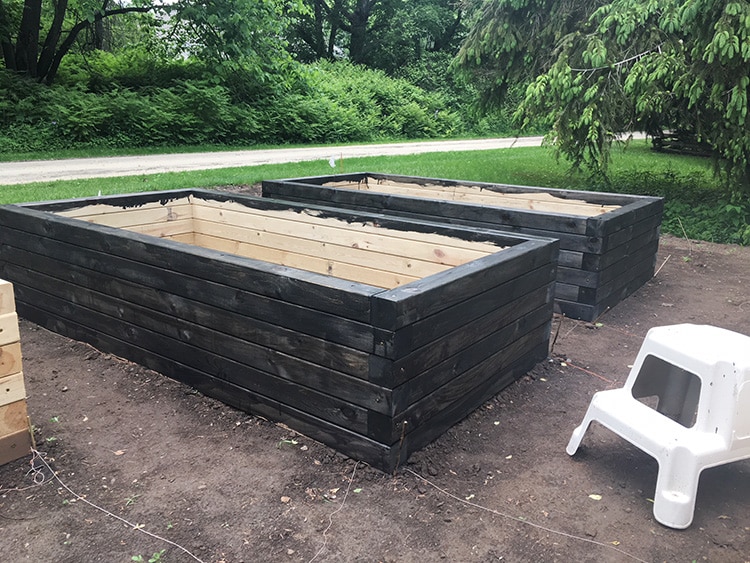
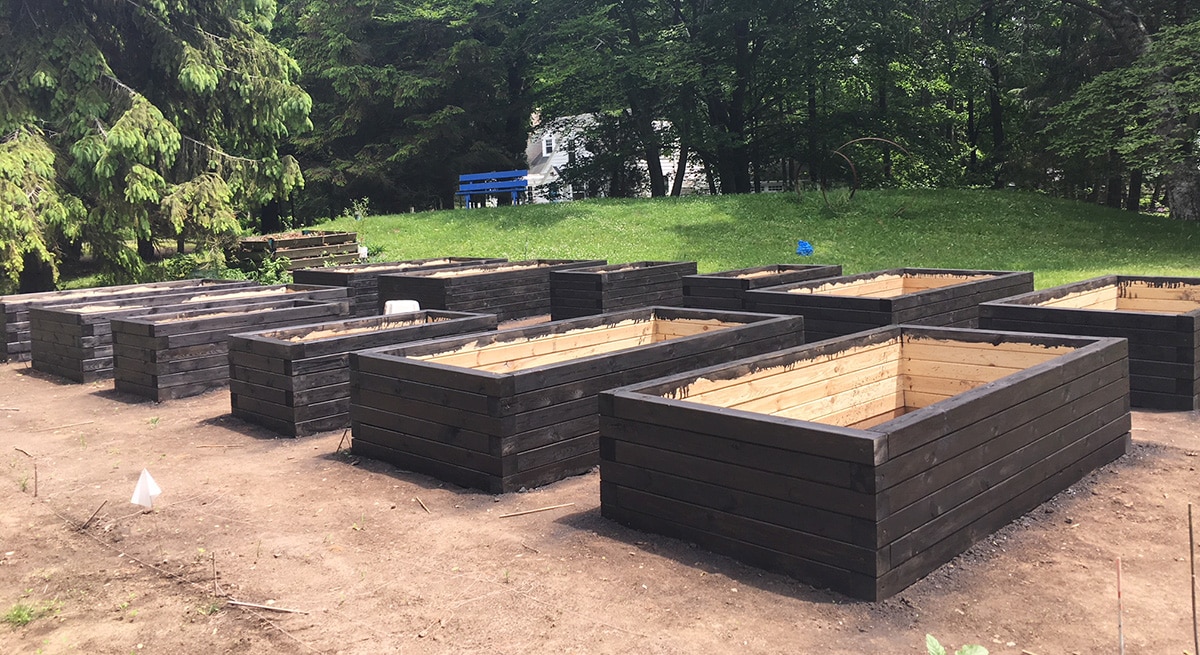
So that’s the process we followed to treat the garden beds inside and out. It was by far the simplest part of this whole garden experience so far and the black stain on the exterior makes me happy. It’s what I had envisioned two years ago when I first started thinking about this project. And better yet, with the inside sealed and the outside stained, it’s time to fill these garden beds with soil.
Catch up with how we got to this point. Here’s the garden plan and parts 1 and 2 of construction.
28 Responses
Great post! How are the beds holding up?
Thank you for the great information especially about the sealer! I have found this post quite inspiring, especially because of the “do-not”s.
Wish I could post my design! Thanks again!
Hey Erin! I was just hoping for an update on your planter boxes, in particular how the wood stabilizer and stain is holding up? We’re considering the same wood stabilizer for the inside of our planter boxes and I’m just wondering how they’re going after 4-ish years and if you’d do anything differently in the construction or sealing of your boxes? Thanks!
I just came upon your website and enjoyed reading about the raised beds,
I would also be interested in a status update on the wood stabilizer but noted there have been no replys from @theimpatientgardener in quite some time. As such, if there is anyone else on this board who pulled the trigger on it I would be willing to offer their opinion on it I would be all ears.
Because that’s where the water sits the most against the wood
I have been an avid gardener in southern Maine for three decades and have experience with raised beds. After moving to a new home, I am modifying my approach and design based on experience plus the fact that this property is more ledgy and has more animal visitors. My new vegetable gardens will reside in a walk-in raised bed of 5″x5″ timbers with an upright timbers + hardware cloth enclosure to keep out animals. I started this project last summer (including leveling the slightly sloped area and creating a packed crushed gravel perimeter base upon which the timbers will sit… good for drainage) and will complete the project this spring. I have used some of Erin’s ideas (thank you!), although I elected to stain and seal each 5″x5″ timber individually using a brush. Specifically, I stained the timber sides-and-a-half that can be seen with two coats and sealed the inner sides-and-a-half with two coats of the recommended stabilizer . (For good measure, I then applied the sealant over the stain, too.). In this way, I hope to keep water from affecting the timber faces that touch one another. There are other tips I could give Erin and readers from my years of experience – suggestions re. pre-drilling holes and other options for connecting timbers, how to prevent the soil from leeching out under the bed timbers, how to keep weeds from growing into the beds, and suggestions for the pathways. (No, layers of landscaping fabric, crushed stone and pea gravel will not stand the test of time. Mother Nature is relentless.). But, I’ll spare you all and wish you happy gardening, instead!
Hello Christina
I would like your suggestions on how to prevent soil from leeching out under the bed timbers and you pathway suggestions.
I also would like to know your pathway suggestions.
How has the stabilizer worked out? How much did the quart cover?
Thank you
Hi thanks for such an informative post ! Really would like to use the most eco friendly option for my garden beds. I am a novice at diy projects and was wondering what the tapped lip was for when spraying the stabilizer ?
Not a very informative article. You wont get much life out of cedar beds and cedar has a toxin that makes it antibacterial. You just dismiss pressure treated. You act as if these toxic chemicals are going to leach into your garden. What toxic chemical? Copper?
Well, to be fair, she didn’t dismiss it, she said she didn’t want it. Also, the Cedar was for the bottom course which touches the ground. The chances of roots ever even getting down there are slim. The boxes are, for all intents and purposes, Pine. I’d rather have nothing than mystery copper. Why wouldn’t everyone?
Hi there, Just found your site. Any ideas on cracks between the wood? We made ours from wood pallets and have gaps where weeds go through and so do some insects. Have a nest of flying ants in one. Do you know of an environmentally friendly wood filler? Can’t seem to find what I am looking for.
thank you
I have redwood raised beds. Should I seal it?
I’m happy I found this article on your blog. We are building garden beds and ordered doug fir wood. Then I realized that they may not last that long. I found your blog and we are using your suggestion – we bought some of the internal wood stabilizer. We live in Portland Oregon where it is made and sold, so we were able to drive there and get a 5-gallon container for the garden beds we’re building. So glad we found this solution. Thanks for your blog!
How much does the stabilizer cost?
Thank you! I just ordered their stain and I mentioned your blog to them. They gave me a few bucks off for mentioning it. I appreciate you brining this product to my attention!
Out of curiosity, how many beds did you coat? We are looking to do four 4×8 beds at 16″ high. Your picture seems like you have 12+ beds. Really love your post, trying to narrow down how much I need. Cedar in the southeast is very expensive but the termites and bugs are insane. My pine beds lasted about 3 years before some damage was getting out of control.
Wow – what a nicely compos{t}ed, informative website! Thank you.
A comment – Since the entire interior of the boxes is in contact with earth (“ground contact”) I don’t understand why the bottom course should be of cedar.
Beautiful garden beds, well done! How would you rate the Internal Wood Stabilizer today? Has it lived up to it’s promises?
Thank you! It’s too early to know much about the performance of the wood stabilizer. Given that the pine on the old beds held up pretty well for at least seven years, I don’t think it will be until after that that we know if the stabilizer is really doing it’s job. But I have very high hopes.
I just read your article and called the company in Portland, OR. You are right they are absolutely fabulous and will be mailing their Internal Wood Stabilizer to me this week! I just bought a raw pine raised bed from a guy in NH, and can’t wait to get it up and planted. I now own 4 raised beds and couldn’t be happier! Thanks for you interesting and well-written article!
Sincerly,
Rita K., MA
I know it hasn’t been 7 years, but do you have anything to report after 2.5 years? I’m trying to decide on how/if to seal my doug fir beds and would love your input, seeing as how I can’t find any county extension info on it. Thanks!
Ambitious project to say the least…wow. My question, are you worried by the time you are finished, the planting and growing season will be over? Are you saving the planting’s till next spring?
I forget how many steps these projects take, which makes your persistence in doing it right even moreimpressive.
You are learning all sorts of useful tips and information with this project. It is looking mighty good too. Is that blue bench up on the hill near your garden where you will sit and watch the tomatoes grow or is that where you neighbor will sit and watch you watching your tomatoes grow?
Nice! Can hardly wait to see them full of happy flora.