I think it’s safe to say I may have underestimated how time intensive the process of building the new raised bed vegetable garden would be. I can say this with some authority since we are now into June and nary a vegetable has been planted at my house. Still, I’m not interested in rushing this process for the sake of time because I’m hoping to do this just once and do it right. Plus, at this point everything is late. Being a little later isn’t going to make that big of a difference.
The first step in the process is also the least satisfying. We had get the entire garden area leveled. Since there was about a two-foot difference with several undulations in between, we opted to have a professional do this. They used the soil from the old raised beds along with another 15 yards or so of topsoil to level everything out.
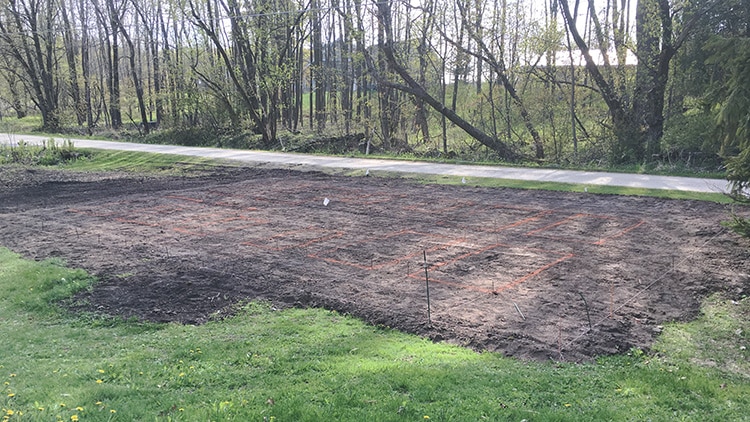
With the area leveled, we had to lay out all the beds. Since this is a very symmetrical design, I knew that if we were off, I would notice (even if no one else would) and it would slowly drive me insane. Fortunately my husband also knew this and he prefers me to be in the sanest state possible (it’s a sliding scale). So we spent a great deal of time with a long tape measure and anything we could use as a stake walking back and forth measuring everything. At some point I decided that the garden should parallel the road, even if the road is slightly angled to the property line. Because this garden is close to the road, I thought it would look odd if it wasn’t parallel.
I’ll admit right here that I’m not great at math (a fact that will come into play in my next garden update), but the best tip I have when you’re trying to lay out rectangles is to measure opposite corners and then the other opposite corners. When the two measurements are the same, you’re square. It’s just a good last check before you make something final.
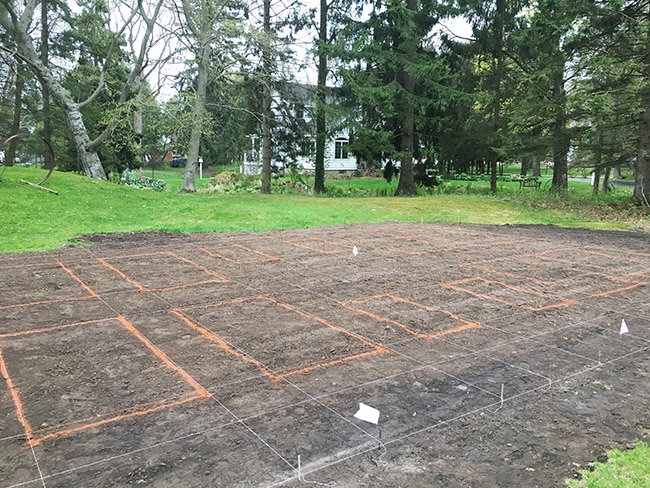
We used string (the kind you use to tie bakery boxes shut, not the kind that any kind of construction professional would ever use, because that’s what we had) to lay out a grid so we made sure that the edges of all the future garden beds were lined up. All of this had the effect of feeling like you were in the midst of a massive jewelry heist in the Smithsonian as you tiptoed through a matrix of laser beams. It also had the effect of making you very crabby when you continually tripped on those damn strings for the next two weeks.


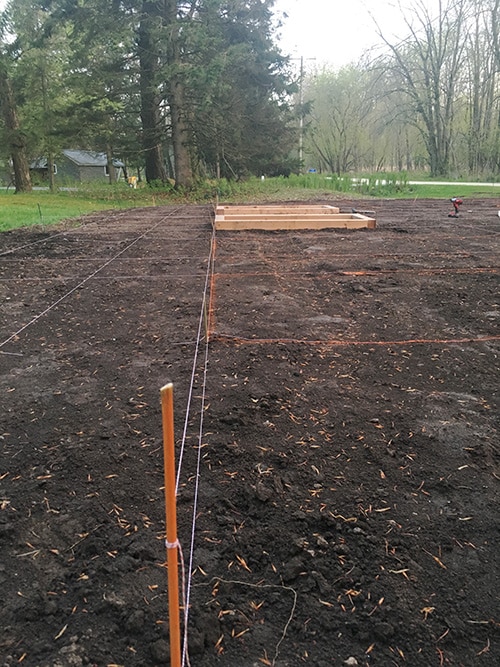
Because we knew there was a chance (yes, a 100% chance) that the string would stretch and sag, we also marked all the beds with spray paint and stakes (bamboo poles cut into pieces) so we wouldn’t lose all our hard work.
It was an onerous task, but one that probably saved us time down the line. It’s certainly one that made me rest easier when we got to the next step in the process.
Because this is not a typical garden—I have a tendency to make everything more complicated (feel free to read that as expensive) than it needs to be—I thought it would be helpful in these posts to point out ways that I could have done it simpler or less expensively. So here’s that part:
Really none of this part of the process has to be done. There’s no reason you have to level an entire garden, but you do need to level each individual bed, so some degree of sitewide leveling is probably necessary. But you wouldn’t have to hire someone. A bit of know-how and some rental equipment could take care of this without much fuss.
As for creating a grid to make sure that every bed is in precisely the right spot, well, obviously that’s a bit over the top. In fact several people mentioned on Instagram that they never would have bothered with such a thing. Sometimes eyeballing it works fine, and if it gets your tomatoes in the ground before July, it’s probably a really good idea.
Coming up next in the great vegetable garden saga: Constructing the beds, also known as “How to avoid getting divorced over a vegetable garden.”
Here are some more posts on the new vegetable garden:
14 Responses
I was wondering how big your overall garden area was? I a planing a big garden move and I am loving your outer fence and black boxes. We are a growing family and are looking at space!
I thought “aversion to math” meant the next post was going to be about the drip irrigation system but maybe that’s still a few posts away?
I know it’s frustratingly slow but definitely worth doing it right the first time.
Oh my gosh!! My Daddy just jumped up and down with glee at this!! This is the man who did not help hang a picture frame on a wall without a level, tape measure, and knowledge of where every single wire, pipe, and stud were in every wall in the house!
Me, I would just rough it in and make sure it looks good…a/k/a: eyeballing it. But, this will be beautiful when it is finished, and then you can laugh at all of us when you have the best looking garden in the country!
You know that we would do it the way you are, too. You are going to be looking at this and planting it and working in it until it falls apart. That is a lot of time to be annoyed if it’s not the way you want it. We rented a transit to survey our garden to determine land levels and slope from back to front before we started any work and probably when Mark started designing. It was an April Saturday and by the end of the day it was snowing and we were barely speaking. We kept wondering why we had moved here and who wanted a garden anyway. Of course, it was a critical step in the whole process but it definitely makes you crabby and questioning why you do these things.
I’m with you on laying out a grid and string. I would be walking with a twitch if it was off kilter. It will be stunning due to all your thought and extra steps.
I’m glad I’m not alone!
Doing it right may seem tedious but you will l be thankful you took your time .It will be beautiful and there are always farmers markets for your veggies this summer. You can also plant a late summer garden for fall produce.
On another issue. I went out to look at my beautiful dayliles yesterday morning only to find out that Bambi and friends had eaten every bud. My language as I delayed this to my husband is not printable. Decided any future flowers will be picked the night before so I can at least enjoy them in the house.
Isn’t that just the worst possible feeling? They do so much damage in one night. I having been using Messina’s Deer Stopper II (smells like cinnamon) with a lot of success for a few years and this year I’m trying out the Wireless Deer Fence. Way too early to make a judgement on how well anything is working though.
I put a little Vick’s or similar product on the closed buds of daylilies and the deer don’t eat them.
Oh Girl, Sometimes it must be difficult to be a perfectionist. Just think though it will be the most beautiful veg garden in the area. I can’t wait to see the results. Even if you don’t get to plant veggies this summer you will drool and stew about the vegs for next year and have something pleasing to the eye in the mean time.
Oh, veggies are getting planted this year come hell or high water!
Good girl!