The area for the new vegetable garden was finally started this week. Leveling has begun, a messy process that involves moving around a lot of dirt.
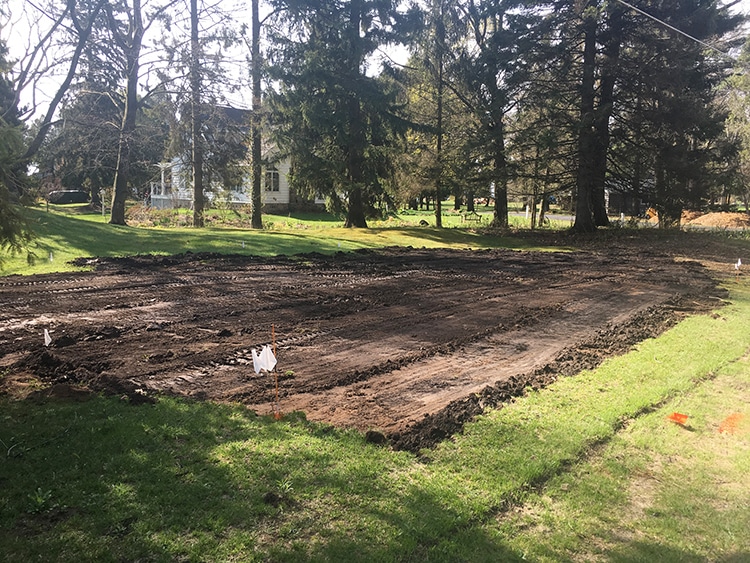
The next step is building the raised beds and I thought the decision making behind the beds deserved its own post.
Gardening in raised beds is very popular, and I can see why. I never entertained the idea of doing a vegetable garden any other way. For me there are so many advantages to raised beds and the only disadvantage is cost. The good thing about the popularity of raised bed gardening is that people are coming up with so many creative takes on on the concept. 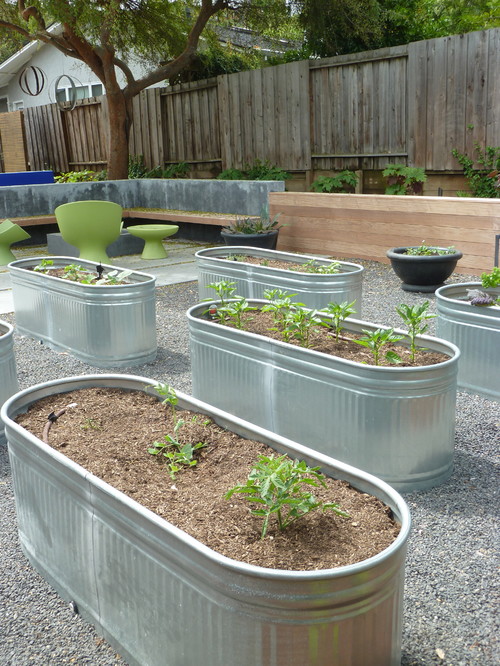
One that I’m quite fond of is gardening in large, galvanized farm troughs. A neighbor down the road did this and I think it looks great. In our area, where the soil can use a little extra heat, the metal beds would probably be an advantage, but in hot locations that could be a concern. But giant containers like these limit the size and shape of a bed, and it just wasn’t the look I was going for.
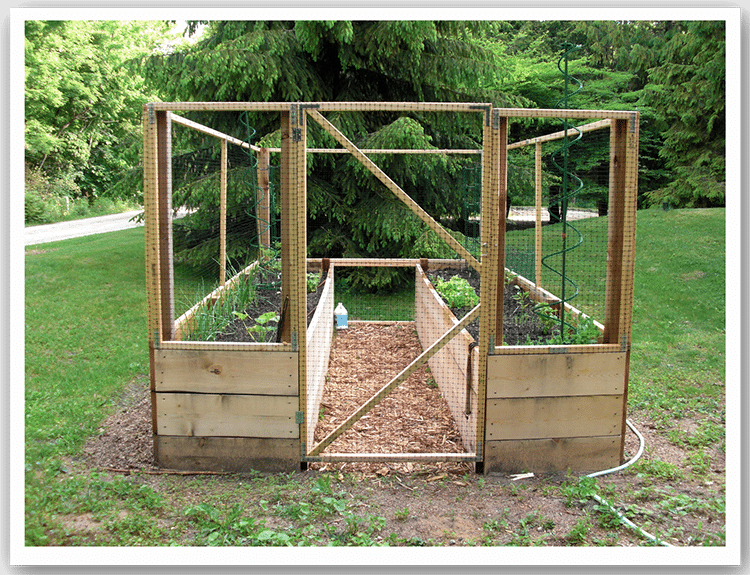
Much of what I decided on for a design for the beds is informed by what I liked and didn’t like about our first raised bed. That bed was 30 inches tall and I loved that height. But the beds were only 30 inches deep so I didn’t have to reach far. In this new garden, most of the beds will be 4 feet by 8 feet and 30 inches could be unwieldy to reach over, not to mention very expensive to fill with soil.
But height is important to me. The previous raised beds were always in good shape because weeding was easy as pie. There was no bending and the weeds were easy to spot. The older I get, the less interested I am in gardening on my knees (which already sound like a bag of potato chips crinkling when I walk up stairs thanks to a serious of somewhat random knee injuries years ago). The goal for the new garden became figuring out the balance between the expense of a higher garden (both in construction materials and soil) and a comfortable height, and I landed at about 20 inches, which happens to be a comfortable seating height as well.
The first raised bed was built with 4-by-4 posts supporting 2-inch by 10-inch boards. Over time, these board bowed quite badly. If I were rebuilding that bed, I would put in cross bracing, but I’ll remedy that situation this time by using thicker boards.
In fact the beds will be constructed entirely out of 4-by-4s. Not only is this a sturdy look that will hopefully create a very sturdy bed, they should be thick enough to avoid the bowing problem. Of course 4-by-4s are really 3½-by-3½, so by using six 4-by-4s on each side, the beds will be 21 inches tall. Gravel on the path will probably cover a small amount of the bottom of the bed, so this is likely to be more like 19 or 20 inches in reality.
There’s a lot of consternation about what kind of lumber you should use to construct raised beds. Cedar or redwood is probably the best because it’s naturally rot resistant. It’s also very expensive. How expensive? One lumberyard quoted me $50 per 8-foot cedar 4-by-4. I found them for about half that at a big-box store. I need about 200 4-by-4s for the 12 beds (they aren’t all the same size, so that’s why I say “about”), so you can see how that could end up being cost prohibitive.
So if cedar or redwood isn’t an option, then what do you use? Pressure-treated pine is said to be safe these days. The process of pressure treating no longer uses the same chemicals. Instead it uses other chemicals. So no matter how safe pressure treated lumber is said to be, I’m just not interested in using it in an organic vegetable garden. Regular untreated pine offers no protection against the elements. Interestingly, it fared about the same as the big-box cedar in the original raised garden. After nine years of use, they were both badly degraded, but the parts of the cedar that touched the garden were almost worse than untreated pine. The parts of the posts that were in the ground were fine. Untreated pine 4-by-4s cost about $8 each.
I’ve decided to go with a combination: cedar for the bottom course that will have ground contact and untreated pine for the top courses. Then I’ll be trying out a new-to-me product (Internal Wood Stabilizer from TimberPro Coatings) to protect the wood.
These are big beds, and I’ve calculated that I’ll need about 19 cubic yards of soil to fill all these beds. (Here’s the soil calculator I used.) And I’ll fill them all with soil. When we built the last raised bed I tried to cut corners on the soil by filling the bottom of the deep beds with branches, leaves and anything else organic I could find. It worked a bit at first, but that material broke down quickly and I was continually having to top up the soil, which sunk almost weekly. I’d rather just fill them properly from the get go and be done with it.
I don’t believe there is one raised bed material that is right for everyone, and I think it’s a personal decision. If you’re comfortable with pressure-treated lumber (and there is plenty of evidence that says you should be), then that’s a viable option for you. If long-lasting beds are the most important thing, maybe you want to spend extra for cedar or redwood. I thought it would be helpful to walk through my thinking on choosing materials.
If all goes to plan (and let’s be honest, it rarely does), we’ll be constructing raised beds by the weekend. Stay tuned.
7 Responses
So exciting to be starting a new raised bed! Ours are now five years old and definitely showing their age. The only area to put our garden with enough open space was a low spot in the front yard so we brought in fill to raise it up (we should have raised another foot or so…we’ve flooded a few times since) and then built the beds in there. Ours are low but I’m sure in the coming years we’ll re-do them and maybe raise them when we are older. We did cedar for the main portions and I can’t remember what we did for the corner posts but my guess is untreated 4x4s because those are now rotting thanks to our humid climate and multiple flooding events.
Have you ever researched Douglas Fir 4 x 4 posts? They’re less expensive than cedar, but I don’t know if they would last as long. That’s what my wife and I are considering for our raised beds.
Thanks for your comments about cedar vs pine with respect to longevity. Our beds (in Chicago) were built from cedar and have failed after 15 years and we plan to rebuild them next year. Our cedar bed lumber was untreated; I think I’ll use a wood protectant this time. BTW I was “introduced” to you on Garden Fork podcasts. Thanks for your contributions to the podcast and the Midwest gardening wisdom you’re sharing in this blog!
I am trying out raised fabric bags from Home Depot for our raised beds. So far they have been easy and everything is coming up. They did take a lot of bags of organic topsoil to fill. They are supposed to last many seasons, we will see. They are not as pretty as raised wood beds, but they were easy to install.
Whoo hooo, you have a blank canvas. It will be exciting to see what you do next.
My question is where do you get soil for your beds? Do you have to amend the soil much? I don’t know of a good place to get soil around here. I put leaves in my raised bed each fall and I still need a little topping off of soil. I don’t grow that much anyway but with a big operation such as yours I am curious about the soil.