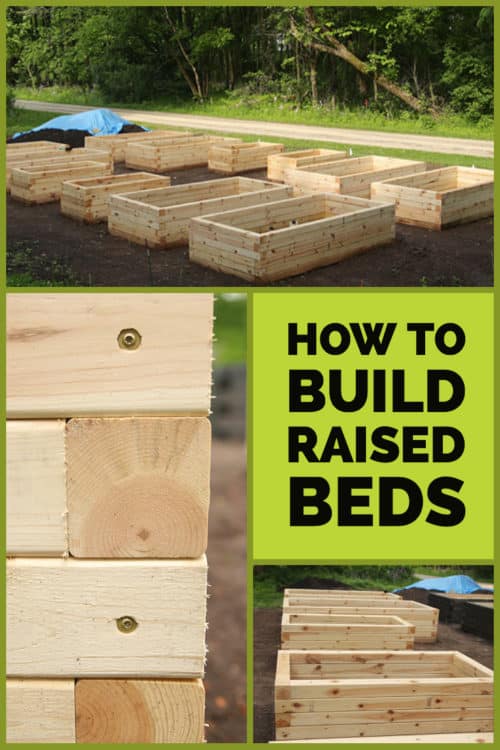
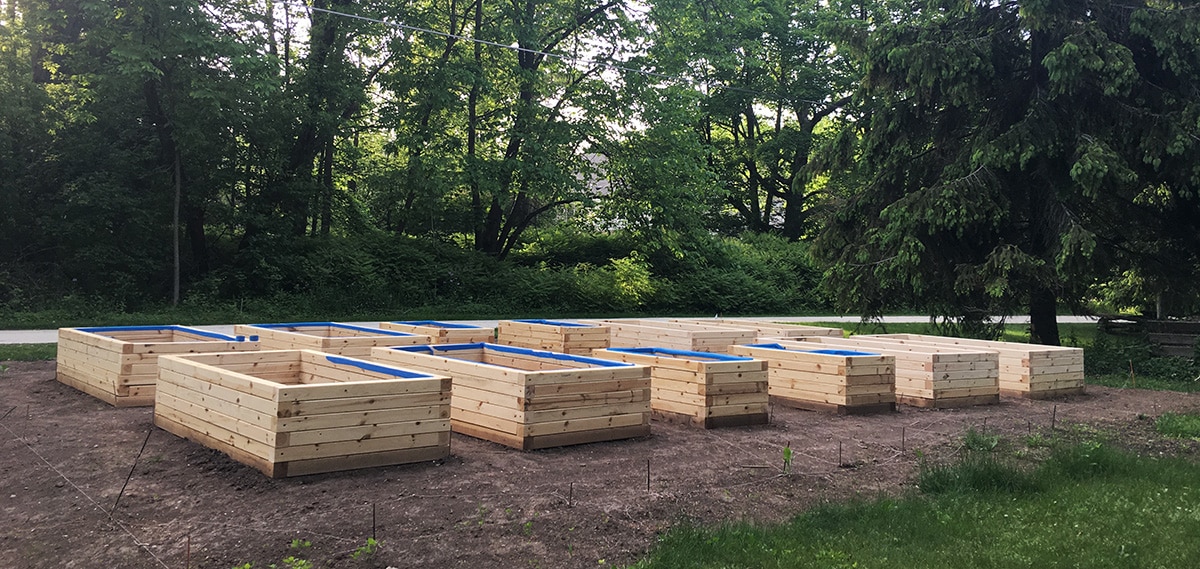
Well, the raised bed gardens are built. And I’ll tell you right now, that took a lot longer than I planned. But they are built and we’re still married. At this point both seem like remarkable achievements.
Before I get into it, if you haven’t read part 1 in this series, I’d recommend you check it out first.
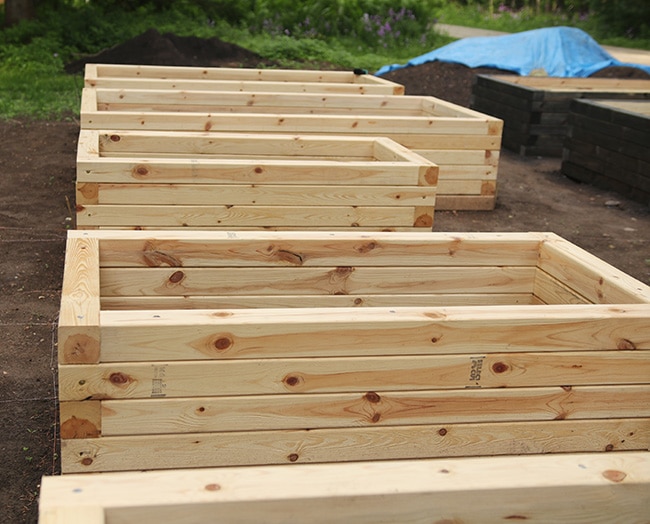
As a reminder, in a quest to balance longevity, cost and safety, we opted to use a combination of cedar and untreated pine 4-by-4s. We used cedar for the bottom course, since there will be ground contact, and untreated pine for the next five courses. You can read more about how we decided on this combination here. The plan was for eight 4-by-8-foot beds and four 2.5-by-5-foot beds, six courses high, making for beds that are about 21 inches tall.
 We needed a ton of wood for this and priced it out at multiple places. We bought the cedar 4-by-4s from a big box store because they were $22 each vs. $50 each at the local lumberyard, but we had to select, load and transport these ourselves. The rest of the wood came from a local lumber supplier. Although the pine 4-by-4s were $1 more each through the local supplier, they selected them, packed them and delivered them to our driveway for free. Those boards were excellent: straight and free of bad knots.
Here’s our lumber list:
(We actually ended up with four extra pine 4-by-4s, so we don’t know if we counted wrong or they did.)
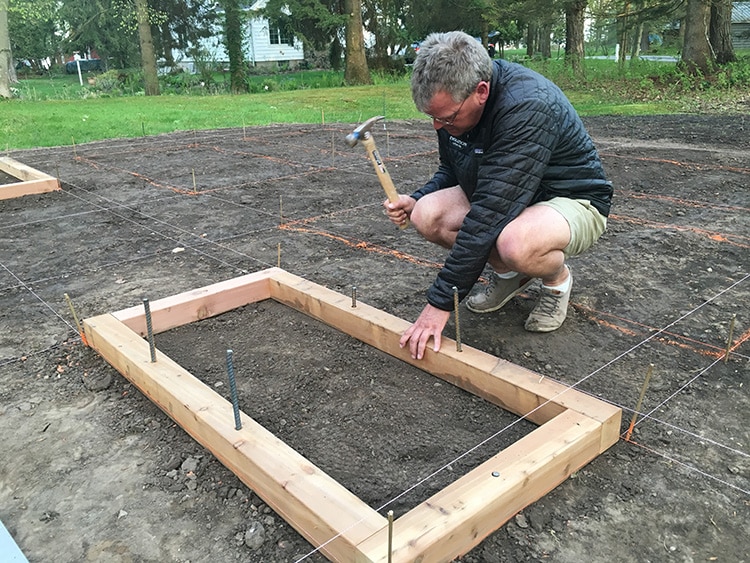
Like almost every project I can think of, the preparation and the first course are the most important. We needed the base layer of every bed to be straight, in line, spaced correctly and leveled. Because we’d laid everything out in part 1, the spacing and the placement weren’t difficult, but the leveling of each bed and then to all the beds next to it, was tricky. We ended up tackling this in three parts over three days because we knew we’d get sloppy if we rushed it. So we did four beds each day (and day was about half the day), starting in the middle.
And here’s where we discovered our major math miscalculation. Have you already seen this coming? I planned the entire garden based on exterior bed dimensions of 4-by-8 and 2.5-by-5 because I wanted to maximize lumber usage and minimize waste and cutting time. But guess what? When you butt up boards to fasten them together that doesn’t equal 8 feet long. It equals 8 feet plus the thickness of the next board for a total of 8 feet 3.5 inches by 4 feet 3.5 inches. Head slap.
Seriously, this was one of those moments when I just wanted to shrink into a ball. I’d been planning this garden for more than two years and this had never occurred to me. But there wasn’t much time to dwell on it because things were moving and frankly, it wasn’t a difficult decision on how to handle it because there was no room to make the garden any bigger. We’d have to cut every single board. (Thank goodness I bought Mr. Much More Patient a nice new chop saw for Christmas).
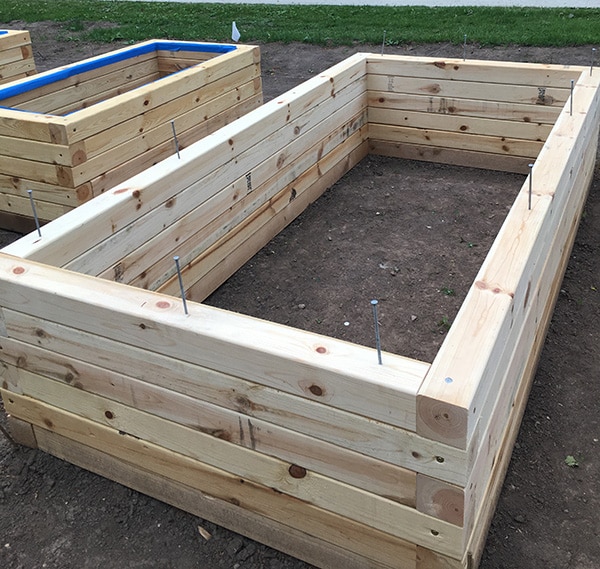
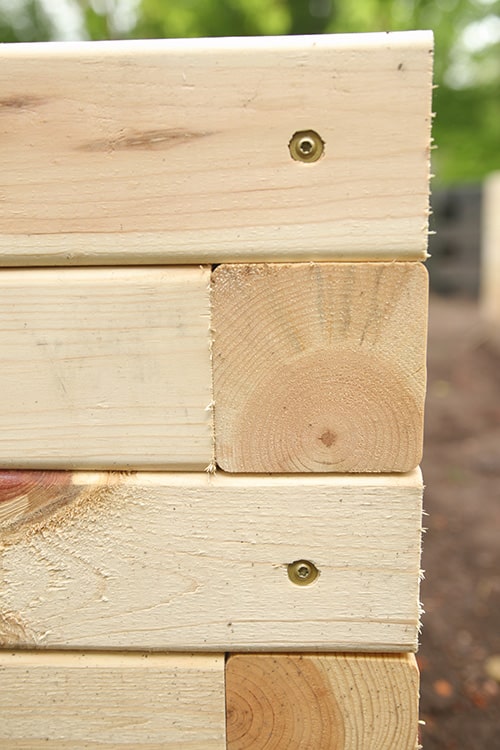
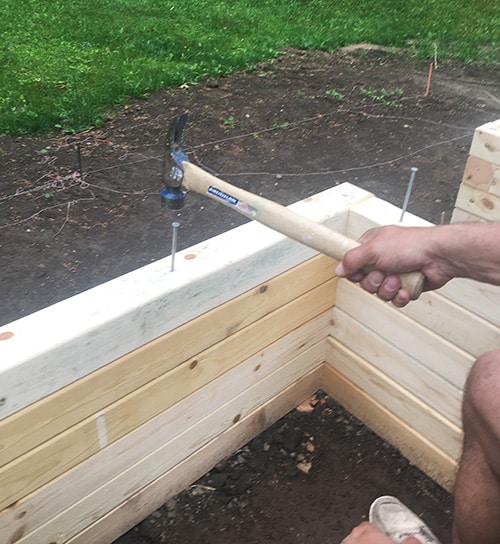
Feeling completely humbled we set about leveling all the beds and putting the first course together. We laid the boards out in a pinwheel shape and used 6-inch long screws in the end to attach the corners. From there we squared them, leveled them and lined them up. We previous drilled holes through all of them as well, which we used to drive 12-inch long pieces of rebar to anchor the beds in place. Frankly it was exhausting but more than that it was very futzy and a more than a little frustrating at times.
But the good news is that this really was the worst part. From there it was just a matter of adding on the additional layers. We didn’t have to worry about leveling or squaring because that was already taken care of. But we did have to cut all those 4-by-4s. We built as we cut because we were afraid we’d count wrong and end up cutting more in half than we should. Clearly by this point we weren’t feeling too confident about our math skills.
 We alternated the joint orientation from the previous course, again, attaching the corners with screws. Then we used 6-inch galvanized spikes (aka really big nails) to attach each layer to the layer under it. We used a nail in each corner plus three in the long sides and two in the short sides for a total of 14 nails per layer. Suffice to say these beds aren’t going anywhere.

So add the following to the shopping list:
This construction method was based on Joe Lamp’l’s, and if you’re thinking about building raised garden beds, his guide is excellent reading.
I can’t take much credit for the construction of these beds. I helped with a few, but by and large Mr. Much More Patient cranked these out on his own (we also enlisted the help of our 15-year-old nephew who enjoys power tools for one afternoon).
I was thinking that soil would end up being the biggest expense in this project, but it turned out that building supplies were almost three times as much. Clearly this is a very involved garden with a specific design that came with a pretty big price tag, but here are some ways you could reduce the costs:
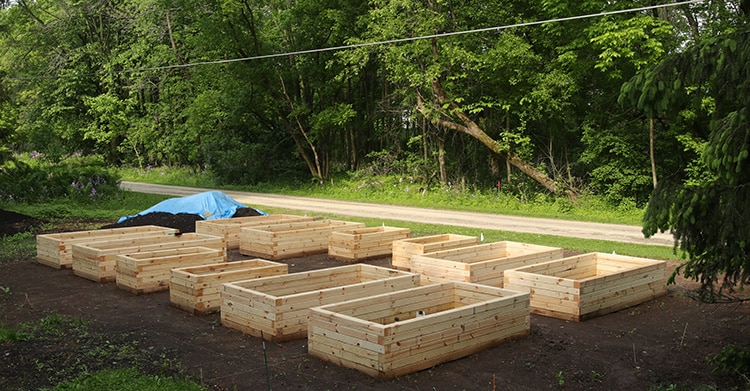 I’m thrilled with how they turned out. I do think that there is a bit of a crest in the middle so all my obsessive leveling was for naught, but on the other hand we won’t have to worry about drainage. It’s subtle and I’m guessing that no one else will notice.
Next up: What I did with that untreated pine.
Catch up with all the posts on the raised beds here:
Here’s a video the details and shows a bit of the process. You can also watch it on YouTube here.