Anyone can garden in a container.
The first gardening I did on my own was in my first apartment after I graduated from college. I lived in the upstairs of a duplex and got the landlord to let me put a single plastic pot on the sunny driveway. I’ll be honest, I wouldn’t call that container a success, but it launched a love of container gardening that continues today.
I plant dozens of containers every year, most at my house, but also at the office, at the family cottage and for neighbors and others. And I’ve yet to run out of ideas to fill more containers.
Container gardening isn’t difficult but there are a few things you can do to ensure success and long-lasting beautiful container plantings that brighten up any area, even your landlord’s driveway.
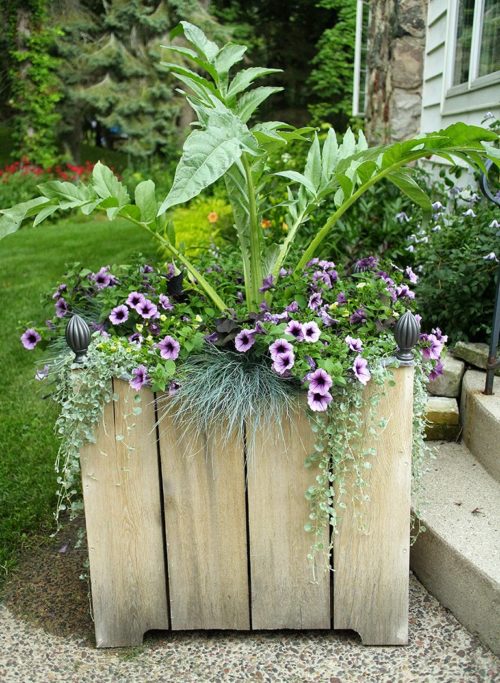
1. GO BIG
Bigger really is better when it comes to container plantings, and not just because bigger containers will make a bolder impression. Small containers need more water and they need a lot more later in the season when plant roots have taken over most of the pot. It can be almost impossible to keep up with the watering requirements of a small pot unless you have a properly set drip line running to it on a timer.
The smallest container I’ll even consider using is 14 inches in diameter and I’m not really happy until I get to the 18 inches and above size. If you do need to use smaller containers, clustering them together will probably not only look better but you may also need to water just slightly less than if they were standing individually.
You want to make sure you fill the container with the right stuff. Do not use soil from your garden or the cheap, really black stuff usually called “potting soil” that comes in bags. You want to look for something called “potting mix.” Odds are you will find a brand you like best (or maybe just a few you really don’t like). If you want to garden organically, there are a lot of excellent organic potting mixes now on the market. There are also mixes with fertilizer and even hydration crystals in it.
Personally I don’t like a lot of extras in my potting mix. My theory on this is similar to the same reason I bake with unsalted butter: I want to control what I’m putting in. I do add a time-release fertilizer to containers (I usually use Osmocote for annual containers, one of the few non-organic products I use in the garden, but I only use organic fertilizers for containerized shrubs or vegetables in containers). If I’m planting a shrub in a container I will adapt the mix to best fit the needs of that shrub, often adding shredded pine bark, well-rotted manure, leaf mold or my own compost.
I also believe in replacing potting mix every year except for the very bottom layer of very deep containers where old potting mix serves more as a space filler than a place where roots ever reach.
One of the bits of garden advice from years ago that has turned into a well-busted myth is the idea of putting gravel in the bottom of containers to aid drainage. As it turns out, it actually slows drainage. It is best to fill containers entirely with potting mix. Occasionally if you are working with a really large container you can fill up some space to save on potting mix. The best thing to use is a false bottom with drainage holes. I’ve seen these in square and round shapes of different sizes at hardware stores and nurseries the last couple years and they are really handy. But those do you no good if there isn’t a size or shape that fits your container.
I’ve found plastic nursery pots turned upside down to do a good job taking up space in large containers. I use a three-gallon nursery pot (again, turned upside down) in the bottom of the very large container by the front door and several smaller nursery pots stacked like a house of cards in the tall containers I use on the deck. It’s important to give a container a little bit of a shake after filling it with potting mix when you’ve got something taking up space because you don’t want the mix to settle after you’ve planted.
When it comes to keeping the potting mix in the containers, I use either coffee filters or mesh drywall patch tape to cover the holes. In a pinch I’ve even used a paper towel. I fill up the container, plant it, water it well, wait a day or two and then go back and poke a hole in the paper towel or coffee filter from the bottom. By this time the soil isn’t going to fall out and there will be nothing to impede drainage.
You know those plant saucers that nurseries make you pay extra for? If you’re growing in outdoor containers save your money and put it toward the cocktail-hour-in-the-garden fund. Those saucers cause way more trouble than they are worth, because the last thing you want is plants sitting in water. And be honest, you know you’re not going to wait until a plant drains and then go pull the saucer out to dump it. Plus, why would you want one more job?
But containers do need to be able to drain freely, plus no one wants to stain the deck/patio/walk where their containers sit. The secret is to raise them up. Get a little airflow under there! You can buy pot feet or get a little creative. I got some hypertufa 2-inch high rounds years ago and still stick them under pots to raise them up. Old off cuts of wood work too and look fine if you tuck them far enough under that you don’t really see them (just make sure you don’t block drainage holes). I even use quarter-inch thick rubber washers from the hardware store when I want a pot to appear as though it’s sitting directly on the ground. That small gap will ensure that water drains freely.
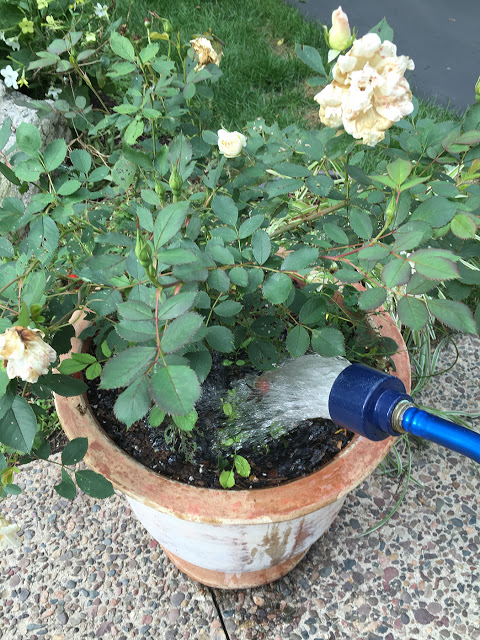
People get hung up on watering and fertilizing schedules for containers and it’s really not necessary. The basic rules for watering anything apply for containers as well: it’s better to water deeply less frequently than a little bit more often. Water your containers until water runs out the bottom. A day (or two or three) later, stick your finger in the dirt up to the second knuckle. If the soil feels dry, water again.
How often you’ll have to water depends on many factors including how hot and sunny it is, the number of plants in the container, the kind of plants, the type of container (terra-cotta pots typically dry out faster), how exposed to wind the container is and how big the container is (see tip No. 1). When I first plant my containers the plants are small and the weather is cooler and it’s not uncommon for me to only water once a week. By the time August comes around the plants are big and the sun is hot and I will have to water the same container every day. Because I use big container I almost never have to water more than once a day but it’s not unheard of.
You’re going to need to fertilize to keep your containers thriving, but I rarely add any additional fertilizer (other than the slow release fertilizer I mix in when planting) for the first month or so. I find the plants just don’t need it at that point.
When they really get growing, though, I try to use a liquid fertilizer every week to two weeks. Like I said, don’t overthink it; they’ll be fine if you miss a week. In general, just follow the directions on the fertilizer and don’t assume that if a little is good, a lot is better. If I’ve gotten behind on my watering and a container planting is looking a little wilted I won’t fertilize. Instead I water it deeply and let it recover before I feed it again. I don’t have a favorite liquid fertilizer and use both organic (fish emulsion and Espoma’s liquid bloom booster are two I use) and water soluble non-organic fertilizers depending the location and use of the container.
Growing in containers needn’t be scary or high-maintenance. In fact if you get the basics down, it’s some of the simplest, and in my opinion, the most enjoyable, gardening you can do.
Affiliate links follow. This means that I may receive a small commission if you buy through them, but the price you pay doesn’t change. Thank you for your support!
[custom_code name=”amazon”]
9 Responses
i HAVE A LARGE BOWL OF IMPATIENCE (A GIFT) AND IT HAS A HOLE IN T HE BOTTOM, HOWEVER THE WATER NEVER COMES THROUGH, THEY ARE DOING BEAUTIFULLY i’M IN SO. CALIFORNIA WHERE IT IS VERY HOT SO KEEP IT INSIDE WHERE THE SLIDING DOORS SHED PLE NTY OF SUNLIGHT. dO NEED TO POKE HOLES THROUGH THE PLANT TO GET THE WATER TO GO THROUGH< ITS A LARGE HOLE
THANK YOU SO MUCH FOR YOUR HELP
This is so awesome, I will definitely keep in mind your tips.
Such great ideas, especially ways to fill up space in large containers. How did I get to this age and not know there was a difference between potting mix and potting soil? I have to go out to the garage and see what I bought last week.
Can’t wait to see what you do this year!
Many thanks for sharing your advice. I’m looking forward to putting all your ideas into practice, once the weather improves in the uk?.
Would it be possible for you to advise me on how to choose and arrange the plants so they look as great as yours?
Beginning to do some planters today. Finally feels like spring and I received an order of oriental lilies, Dahlias and Calla lilies . They are all in the apricot to orange color tones and should be lovely in the large container they will be planted in to be set out in the middle of one of many garden beds. Still need to choose a spiller for this pot. Maybe asparagus fern or some a Swedish ivy. Any ideas?
Try using dichondra silver falls – it is beautiful with any color- I always have good luck with it
Love the idea of stacking plastic pots in the bottom. I too have come to the realization that small pots just don’t work for me.
Good advice.