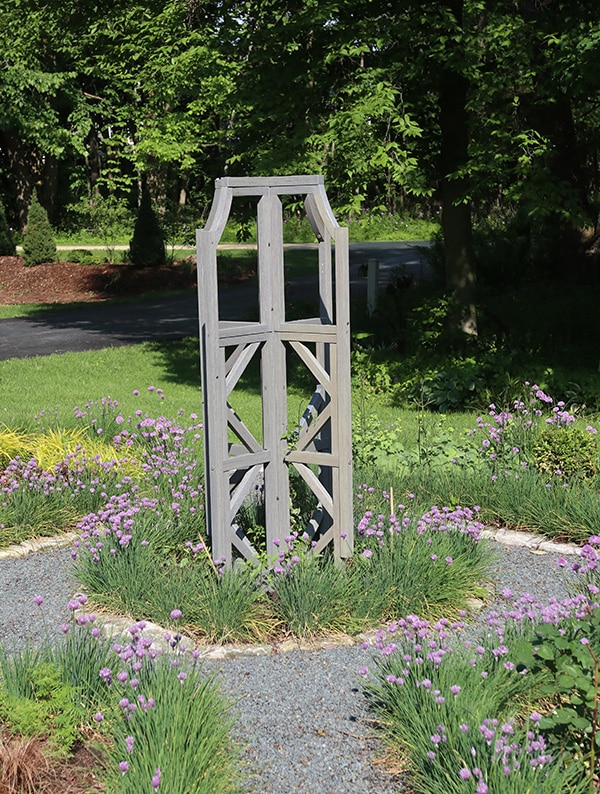
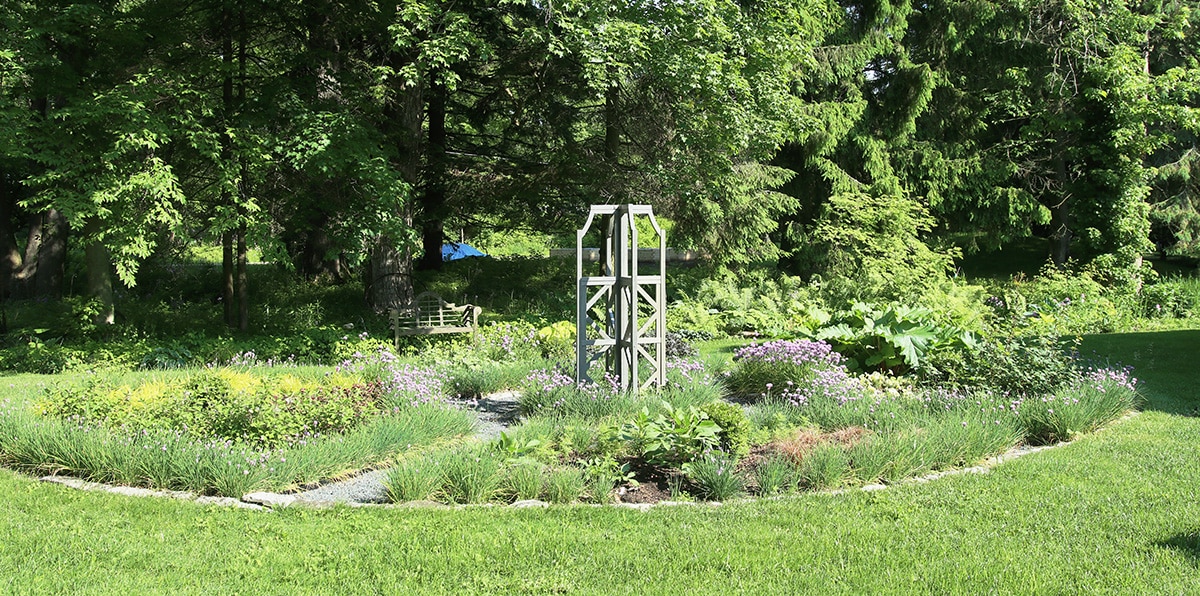
Awhile ago I read that plants abhor copper and that it actually inhibits vines from growing up it. I wish I could remember where, but it probably doesn’t matter because I now think this is unfounded at best and bullpucky at worst. I can’t find any scientific sources to suggest that’s actually the case. But that little bit that I may or may not have read was enough to have me rethink the copper obelisk in the middle of the circle garden. I have pretty good luck with clematis (knock wood) but the ones I’ve planted in the circle garden haven’t thrived like I had hoped (obviously it’s the copper, not the gardener, right?), plus I was just ready for a change.
I found exactly what I was looking for in this obelisk. I’m not even sure it’s technically an obelisk. And it wasn’t exactly what I needed, so I’m clearly taking a lot of liberties in how I’m recalling this. Anyway, I ordered it at about 2 a.m., which is when all great shopping decisions are made. But never fear … I had a plan!
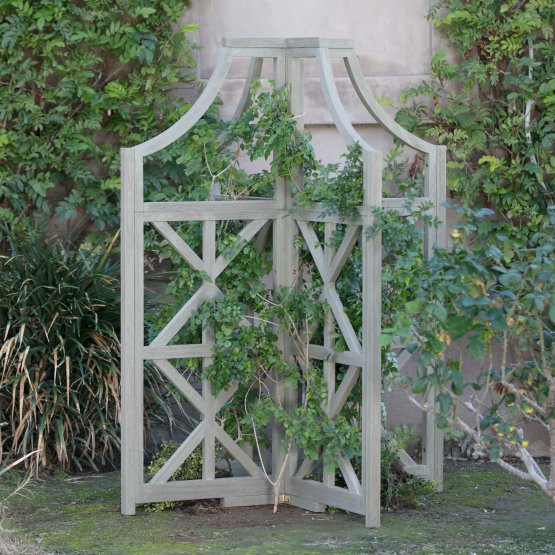
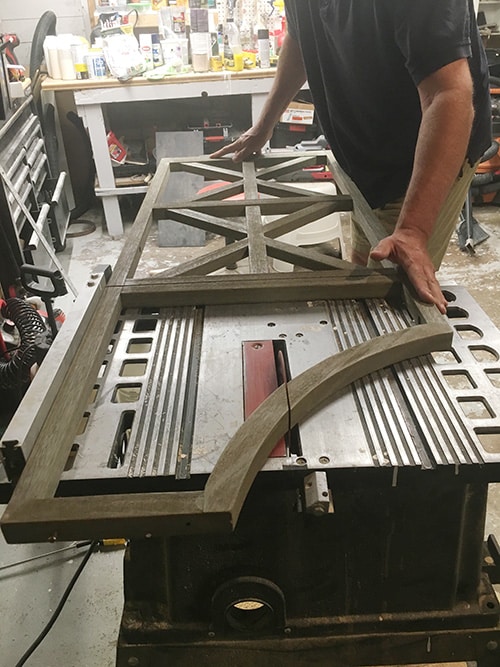
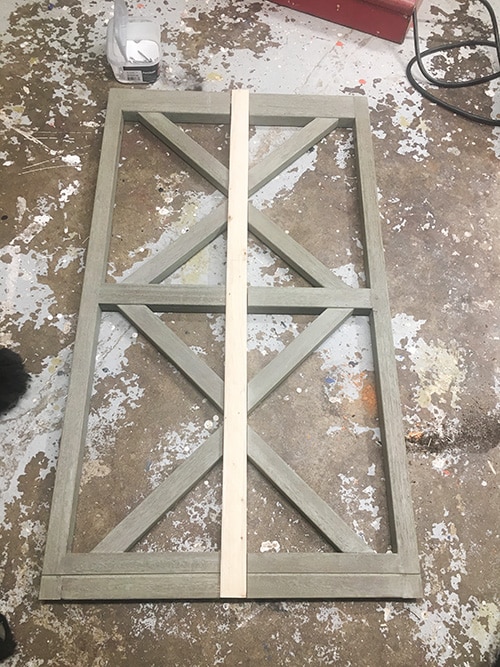
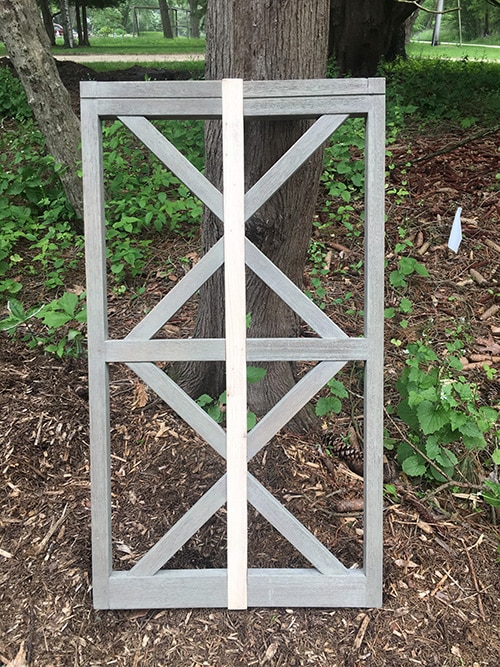
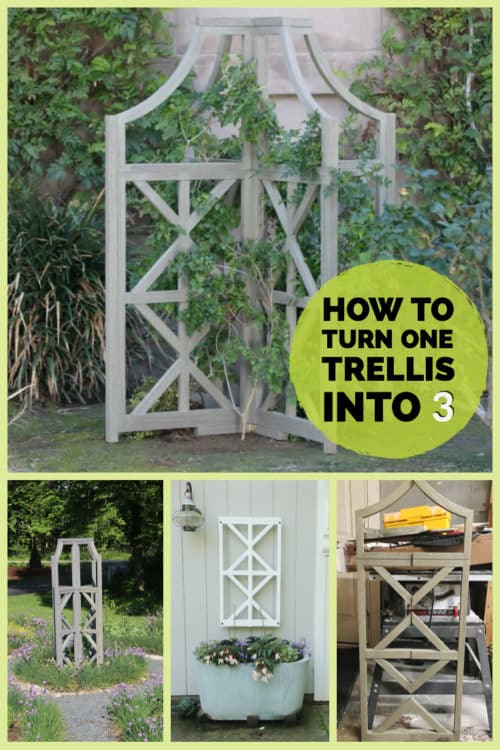
Heightwise it really was right, but it was way too wide for the circle. So I did what any semi-sane gardener would do: I cut that brand new trellis/obelisk/vine grower-upper thing in pieces.
It’s really not as nuts as it sounds. If each arm were half the width it would truly be perfect for that spot. So I had Mr. Much More Patient (who by this point doesn’t even blink when I suggest taking things straight out of the shipping box to the saw) run each arm through the table saw. I’m all about using the power tools myself, but I will not go near that table saw. The one we have is not one of the fancy new ones that automatically retracts the blade if your finger gets in the way. Actually it conveniently no longer even works with the finger guard on it, so you just have a huge blade sticking up waiting to cut off your hand. It freaks me out so much I pretty much look away when it is in use.
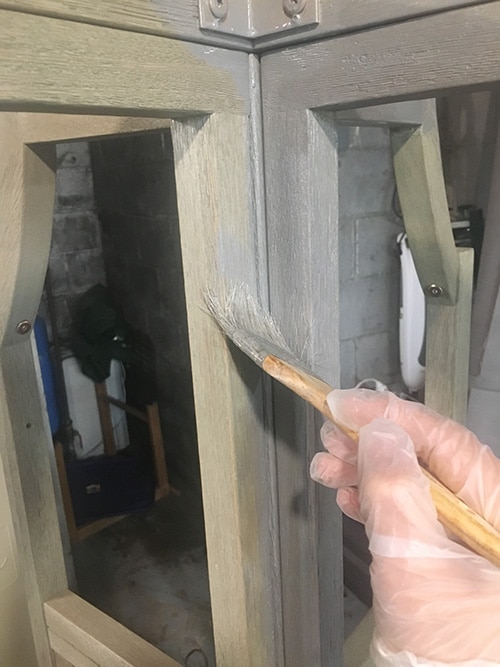
Then (and by then, I mean a month later when it was raining out so I couldn’t work in the garden), I put the obelisk/trellis together according to the directions, but instead of putting the strip of wood on the outside of each arm as instructed, I put it up to where we’d cut each arm and drilled new holes to screw it in to the trellis. That strip ended up being a touch short, leaving about a 5 inch gap at the bottom where it should have touched the ground, but I figured there will always be plants growing around the bottom of this and you’ll never see that area.
I also ended up throwing a coat of Classic Gray Minwax stain on it because the existing finish was more of a greenish tan. The stain makes it coordinate with the nearby containers that I stained in the driveway and in the patio garden.
But wait, there’s more!
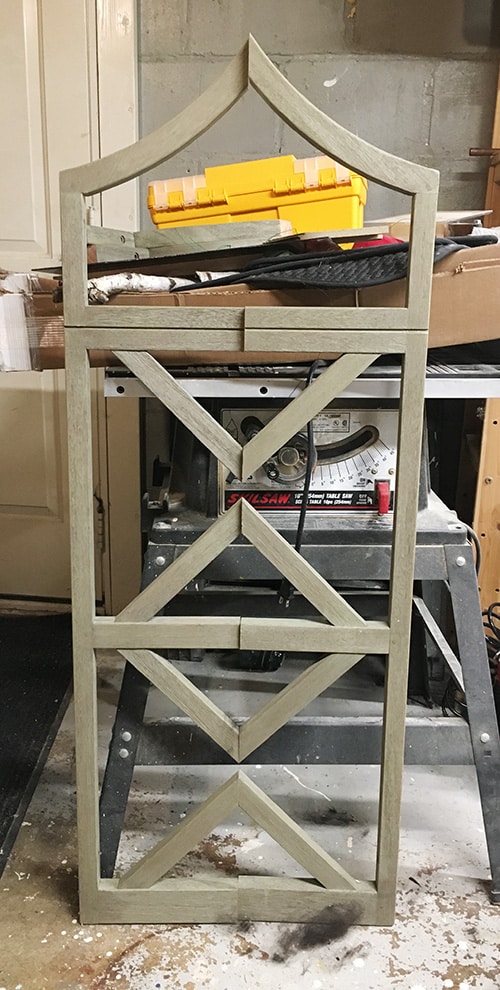
So I know you’re thinking that it was pretty stupid to buy a trellis/obelisk thing and then cut it apart. Well guess what? I got two more trellises out of it.
I needed something by the garage for the Thunbergia vines in the trough planter to grow up (my hope was that they’d reach the pergola, but they are being very pokey so that is starting to seem unlikely). So I took two of the cut-off portion of the arms (maybe I should call them wings?) and cut off the curvy bit on the top with the chop saw, which I’m cool with using. Then I cut a 2-by-2 to length creating a center spine, and we screwed the sides into the 2-by-2. We didn’t worry to much about keeping it pretty; this isn’t something that will be viewed closeup and hopefully it will be covered in vines. Then I spray painted the whole shebang in the white color of spray paint that was on sale at the hardware store.
We mounted it with spacers behind it right to the garage. The Thunbergia won’t twine up it, but I intend to guide it until it becomes self-supporting. Worse case scenario I can always sneak a bamboo can in there for some additional guidance.

And I still have two wings left to create another trellis. I don’t have a use for this one yet, but I’m sure something will come up sooner or later and I’ll have a trellis at the ready.
So that’s how some late-night online shopping ended up in making three trellises out of one. I’m pretty smitten with them.
[custom_code name=”amazon”]
22 Responses
Always loved the circle garden trellis, but sadly, just learned it is no longer available. Perhaps I’ll luck up during my own 2am shopping spree online…
Happy gardening, Erin!
What’s up colleagues, its fantastic post regarding teachingand fully defined, keep it up all the time.
I love all 3! You are very creative!
Brilliant!
Thanks, Barbara!
Don’t worry about your black eyed Susan vine. They are slow to grow but if you put up some twine on your obelisk they will begin to climb and then watch out. I grow them from seed every year and by August they are 6 ft tall and loaded with flowers.
Oh great to know! I’ve grown them before but I’ve always bought plants. This was my first year growing from seed and I put them in almost every container so I hope they do well.
Like they say, necessity is the mother of invention and you have done it in spades! Great job!
Thanks, Jamie!
That is fabulous! and resourceful I might add. All 3 look very intentional and classy.
Thanks!
You are so brilliant with these kind of things. My personality just does not go in this direction so I am always both amazed and envious of all your projects inside and out. Plus I am not a tool-girl, let alone power tools which makes a big difference in the projects I do vs what you do.. Frankly the tools I have the most of are two big bins of fancy baking equipment which I never use anymore! The supports look fabulous and you are growing that gorgeous white weeping Begonia (?) as well.
Thanks, Linda! Yes! That’s Bossa Nova White begonia. I love the sort of peachy pink backsides of the flowers. All my containers need a shot of heat and sun (so much rain this week!) to really start filling out. I’m looking forward to that happening.
I too love how you made your purchase fit your needs and found a way to use the leftover pieces, I can’t wait to see what you do with the third one. I love the shape of it. I even wondered if you might be able to use it in one of your new raised beds to support pole beans or cucumbers. I have seen where others have their cucumbers grow up instead of flat on the ground, which makes for easier picking. I could also see a plant hanger attached to the top section and having a basket of flowers fill that opening. I’m sure you’ll come up with something very clever! I love reading your blog and getting inspirations.
That’s an excellent idea! That would be a very cool cucumber trellis. I think I could staple some of that plastic fence stuff to it to make it easier for things to climb. Thanks for getting the wheels turning!
I absolutely love what you have done to get three!!! Sorta like gardening, dividing our plants, and getting more bang for our plant bucks!!! BTW…I have onion lamps on the exterior of the front of our house like the one in your garage picture. In New England, Connecticut, the onion lamps are perfect for our center chimney cape. Ours are black and I’m guessing yours are copper. I am always excited to get your newest updates…thanks for being such a cool gardener!
I love onion lamps. I wish I would have put them on our house as well, but I didn’t and well, you know how high exterior lighting is on the priority list. Not very, unless it’s broken. Thanks for your nice comments!
Genius! Now I am eyeing the 8 foot floppy pieces we ripped off the boards my husband is using to fix rotted spots in our deck. Surely I could make something with those…they aren’t terribly strong, but maybe we could weave them together and make a screen for a backdrop somewhere in the garden. If it isn’t a trellis, it won’t matter if it falls apart in a few years, right?
Absolutely! Go for it!
Such a clever woman and a talented helpmate. An excellent way to use up all the leftovers.
I’m lucky he just goes along with this stuff!