There is great irony in writing about varying methods of watering a garden after of two weeks of nearly constant rain here, a weather cycle I can’t remember the likes of but I know so many other gardeners have faced this year (or the exact opposite, and I’m not sure which is worse).
Still, after coming off the most deadly year my garden has seen in the 15 years I’ve been digging in the dirt here, I got very serious about watering this year. The losses my garden sustained were due to crazy winter weather—a November heat wave followed by bitter cold, very limited snow cover and a fair amount of freezing and thawing—but I believe that many plants may have been better prepared to survive this bizarre weather if they’d not been stressed going into winter. And one of the worst plant stressors is lack of water.
I have been particularly careful about keeping new trees and shrubs well watered this year. These are expensive plants and I want to do whatever I can to give them the best chance at life. And that means reducing water-related stress.
There are four areas in the garden that got special water systems this year: the new garden at the end of the driveway, the hornbeam hedge, the skinny patio garden along the house and the new vegetable garden.
The last three are all drip irrigation systems, something I’ve been completely intimidated about forever. I finally just got over it for this vegetable garden project because I felt it was a necessity, and having figured that out I had the confidence to hook up other areas of the garden to it as well. I’m going to do a complete, nitty gritty how-to post on the vegetable garden drip, but the drip irrigation for the patio garden and the hornbeam hedge are dead simple.
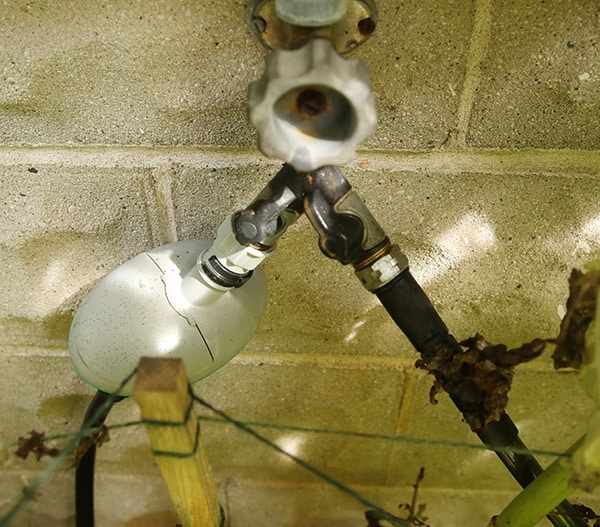
For the patio garden, I started with a Y-valve off the spigot so that I could still have a hose hooked up for watering containers, but on the other side of the valve I hooked up the simplest automatic timer I could find (I only have so much patience to figuring out how to set these things up). I ended up going with this one, although I had to send the first one back because it didn’t work properly.
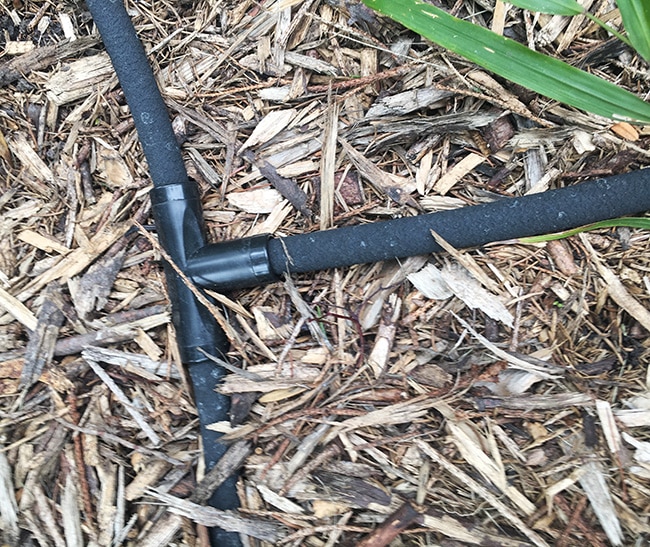
From there I extended a piece of solid half-inch irrigation tubing, to the ground, then used a T-fitting to split it in two directions. Off of each side, I attached half-inch drip tubing with emitters built in every one foot. I got one that emits a half gallon of water per emitter. At the end of each side, I capped the tubing.
These are the products I used, but note that as far as I can tell, there’s nothing special about these and the same or similar products are available at several places, including Amazon (I’ve linked at few at my Amazon storefront as an idea) and brick and mortar stores.
Figuring out the timing took a little bit of playing around. I ended up setting the timer to run for three hours once a day for the hot part of a summer, but I’ve scaled back to just one hour a day in cooler weather.
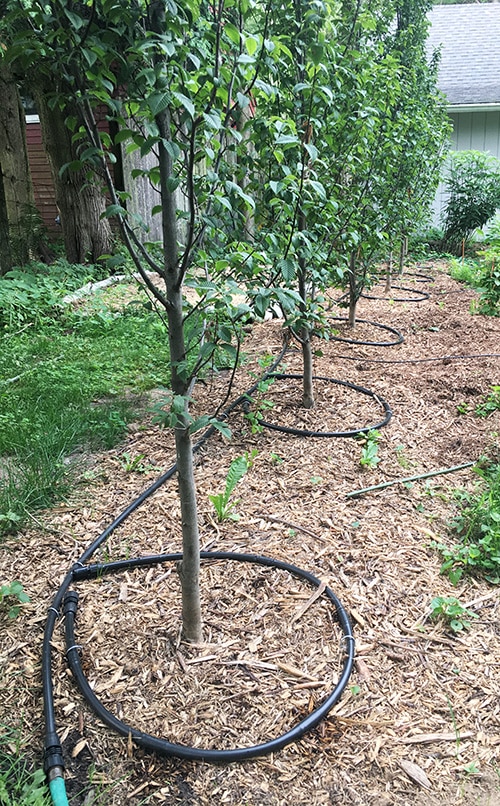
I used the same components to set up a drip system for the new hornbeam hedge. For this area I ran the mainline tubing down the length of the hedge, then used a circle the drip emitter tubing around the root zone of each tree. I capped each circle with a cap.
The difference with this system is that it is not hooked directly into a water supply, so I used a female hose start on one end. I drag a hose over to it and connect it about once a week, letting it run for about four hours for a nice, deep soak.
I didn’t have to use any math (other than simple distance to figure out how much tubing I needed) for either of these applications and I could have used a different size tubing as well.
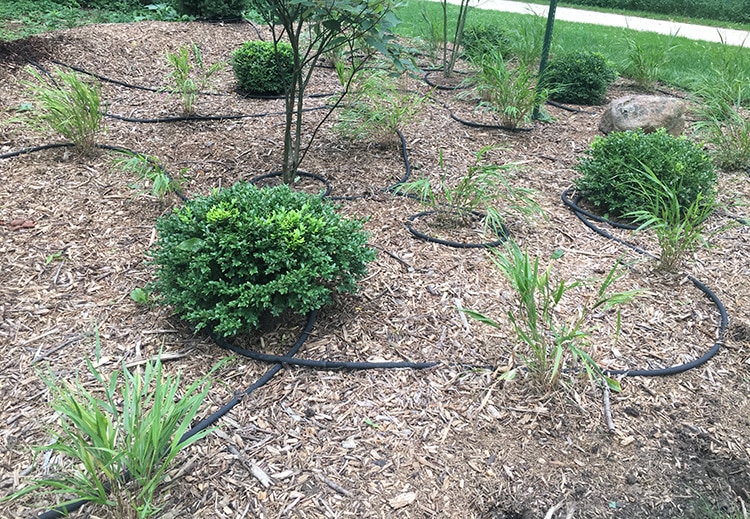
I also hooked up a watering system for the new garden at the end of the driveway. For this I used a soaker hose kit. Flexon sent me two to try out. I’ve used soaker hoses — which seep water along the entire length of hose— before, but they can be a waste of hose length if you aren’t trying to water in more or less a straight line. What is different about this kit is that it comes with several fittings that allow you to cut the hose and split it in different directions as needed. This worked well for this garden because I wanted to make sure that every tree, boxwood and grass had water.
Putting the fittings in was very easy, just a matter of cutting the hose with my pruners and then pushing the fitting in to the end of the hose. I needed more than the 100 feet of hose that came in one kit, and I was planning to just attach more hose, but learned that Flexon doesn’t recommend extending the hose beyond 100 feet, so I used a second kit.
Again, these kits require that I bring a hose over and connect it once a week.
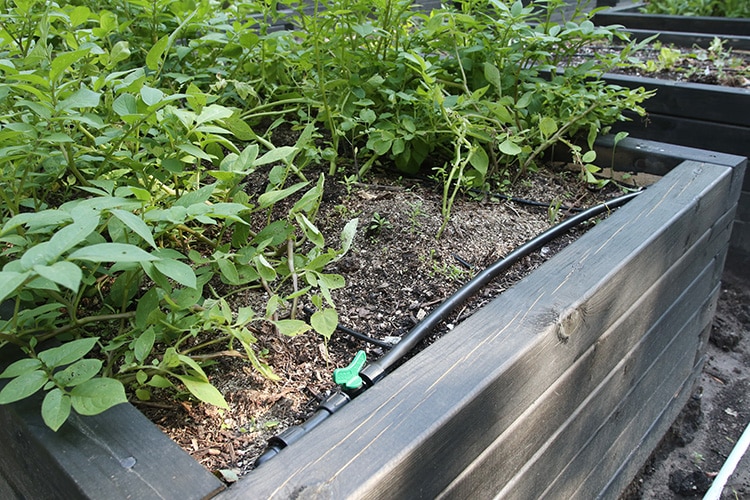
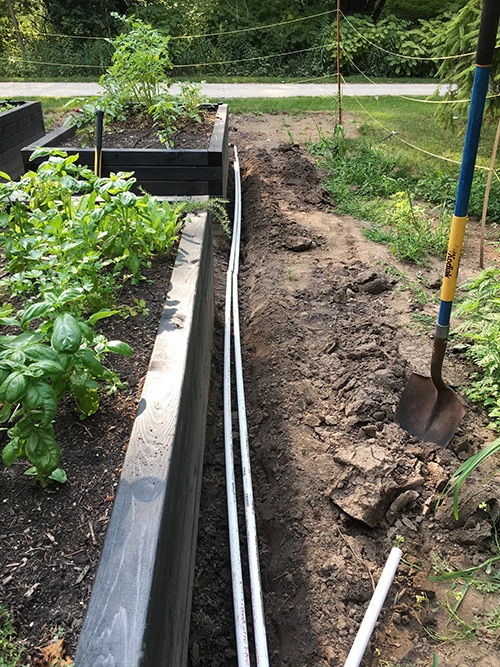
The irrigation in the vegetable garden was a bigger project, and as I said, I’m going to do a dedicated post on that, but here’s a peak on the inner workings (soon to be buried).

I’ve already seen the benefits of these watering systems. I’m having the best dahlia year I’ve ever had in that skinny patio bed and I’m 99% sure it’s because they’ve been receiving consistent water. The other annuals and the climbing rose in that bed seem to be enjoying it as well.
And all of the trees and plants that have been getting water look less stressed than almost any trees I’ve ever planted at this point in the season. If I hadn’t hooked up a water system on the ground I would have either had to water by hand, which I know I would not have been consistent about, or used a sprinkler, which isn’t really the best for plants.
I will keep up on the watering, particularly in these areas where plants are still getting established, right up until the ground freezes, and I’m confident my efforts will help these plants make it through winter.
In the patio bed I’ll turn off the water before we get a killing frost to allow the dahlia tubers to dry out in the ground before I dig them to store for winter.
5 Responses
I’ve been using a drip system for 30 years, and I understand that it can be intimidating when you first start. But, it is so simple to install and a timer makes it an absolute breeze. I even converted our sprinkler system to drip when I relandscaped the front yard. It doesn’t take a man to make it work.
I had also thought that watering systems are meant to be done by professionals only (or men at the very least). Thank you for sharing how you installed yours.
Oh I SO want a watering system!! But I’ve been afraid to tackle it myself. I thought I needed a professional. Maybe not…
🙂 gwingal
Nikki that is absolutely what I thought too! I just decided this year that I’d figure it out and once I just sat down and put it on paper it was not that hard. Really the only difficult part is the planning, after that it’s just pushing a bunch of fitting onto tubes. I’ll do a complete step-by-step rundown of the process for the vegetable garden soon, but these simple drip systems I put together in the patio garden and by the hornbeams were complete no-brainers. I’m kicking myself a bit for not doing it sooner.
Thank for sharing great tips! ?