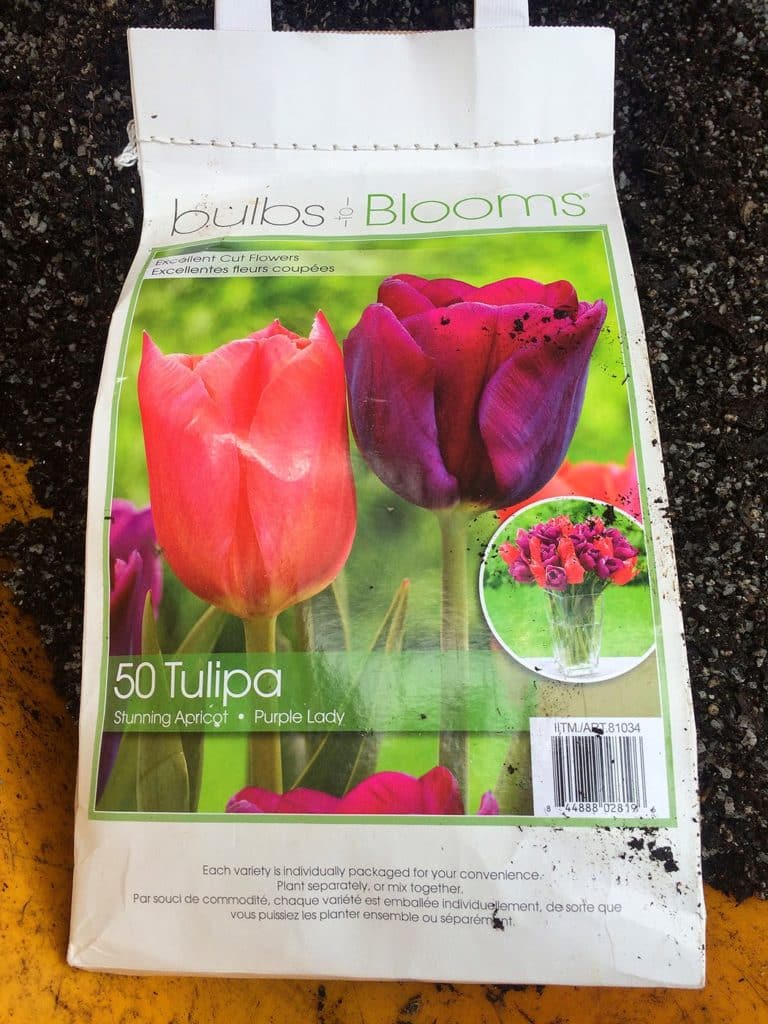
It’s been several years since I’ve planted any bulbs, but last spring I was kicking myself for not having more color around because it is so appreciated at that time. I picked up bulbs at Costco and from Brent and Becky’s Bulbs (my first time ordering from then and I was very happy with my purchase) and planted them all in about an hour or two.
I’m not going to tell you how to plant bulbs because really it is the most simple of gardening tasks. Dig a hole to the proper depth (it’ll be on the back of the package), stick the bulb in pointy side up, cover it with soil, water it and sit tight until spring. There are other things you can do, including fertilize with bone meal and recently I read a suggestion to soak bulbs in Moo-Poo Tea before planting. I don’t honestly think you need to do either of those things if you start with good bulbs but they might help keep them going in future years.
I did try a little gardening experiment though. Growing tulips at my house is a pointless activity. Some critter always eats them. But they are so beautiful and I didn’t want to go another spring without them. So I’m growing some in a container. In fact I’m growing a whole bunch of bulbs in a container.
I started with a medium-sized planter, the one I grew the patio tomato in this summer, actually. I also reused the potting mix I used for the tomato, although I added a lot of grit to it (I’ve discovered chicken grit, purchased at a feed store, for this purpose). Bulbs contain everything they need to grow, but they don’t like being soggy, so good drainage is really important.
To create a layered effect of bulbs that should bloom from late winter or very early spring all the way through the warmest days of spring, I selected three varieties. I picked a late-blooming tulip (honestly, I can’t remember the name but it was a purple and apricot mix from Costco), a mid-spring blooming daffodil (‘Avalanche’) and a mixture of very early blooming dwarf irises. If you wanted to try this same layering effect, you can really do it with any bulbs so long as you layer them from earliest blooming on top to latest blooming on the bottom.
 |
| Sure, I could have made a fancy Adobe Illustrator graphic for you, but this photo of a sketch I made took exactly one minute to create and you get the basic idea, right? |
I started with enough soil in the container to be able to plant the tulips (the last to bloom) at their proper depth or a touch deeper (about 9 inches) and packed them in shoulder to shoulder. Then I layered on more gritty potting mix and planted the daffodils about 6.5 inches from the top of the container. I didn’t have enough of these to pack them in as tightly, but I evenly spaced out the 10 bulbs I had.
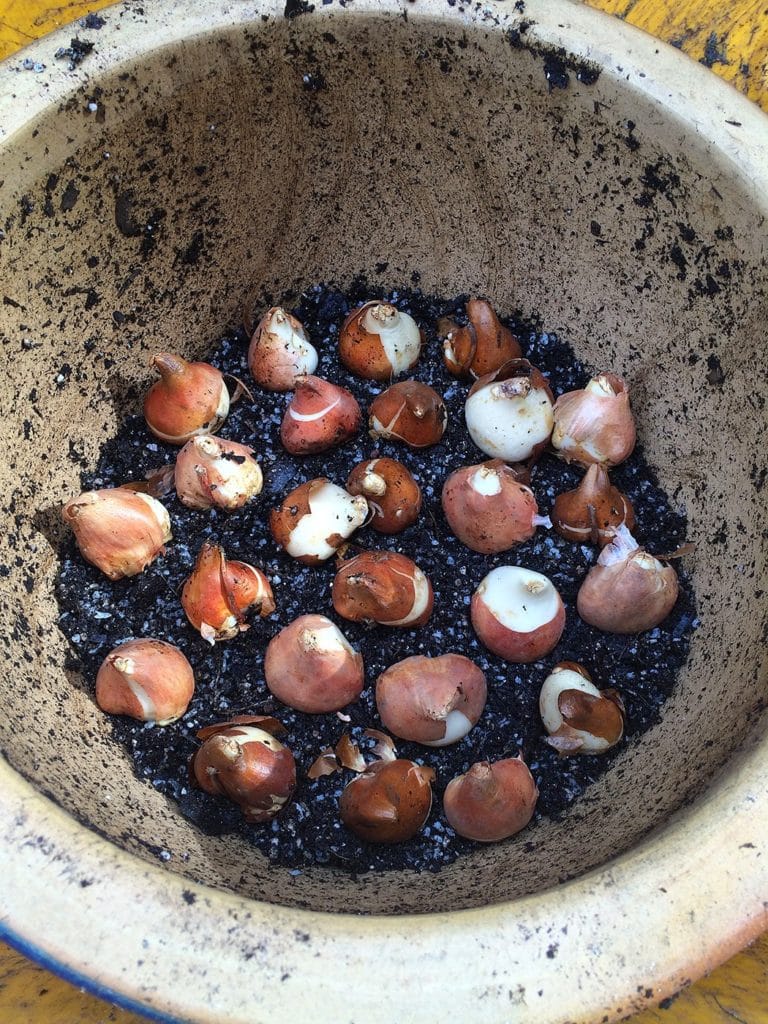 |
| Tulip bulbs packed in tight make up the bottom layer. |
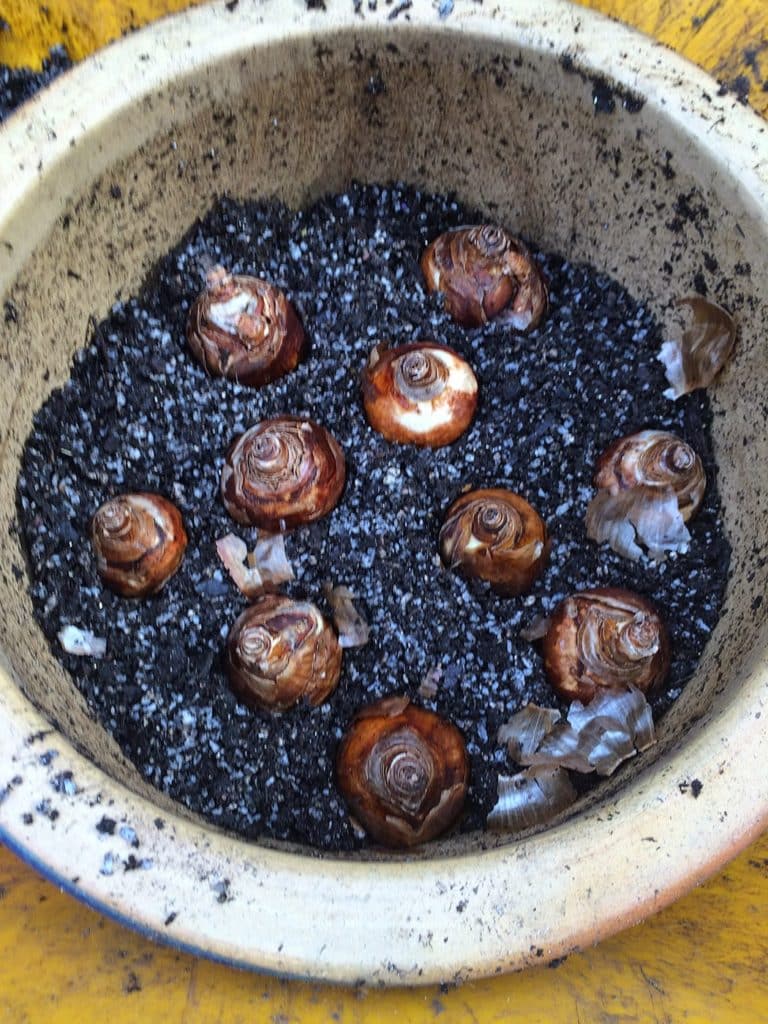 |
| Daffodils make up the middle layer. |
You get how this goes by now. I covered that with more soil and planted the irises about 3 inches from the top and covered them with soil, filling it all the way to the rim of the pot because I’m sure it will settle throughout the winter.
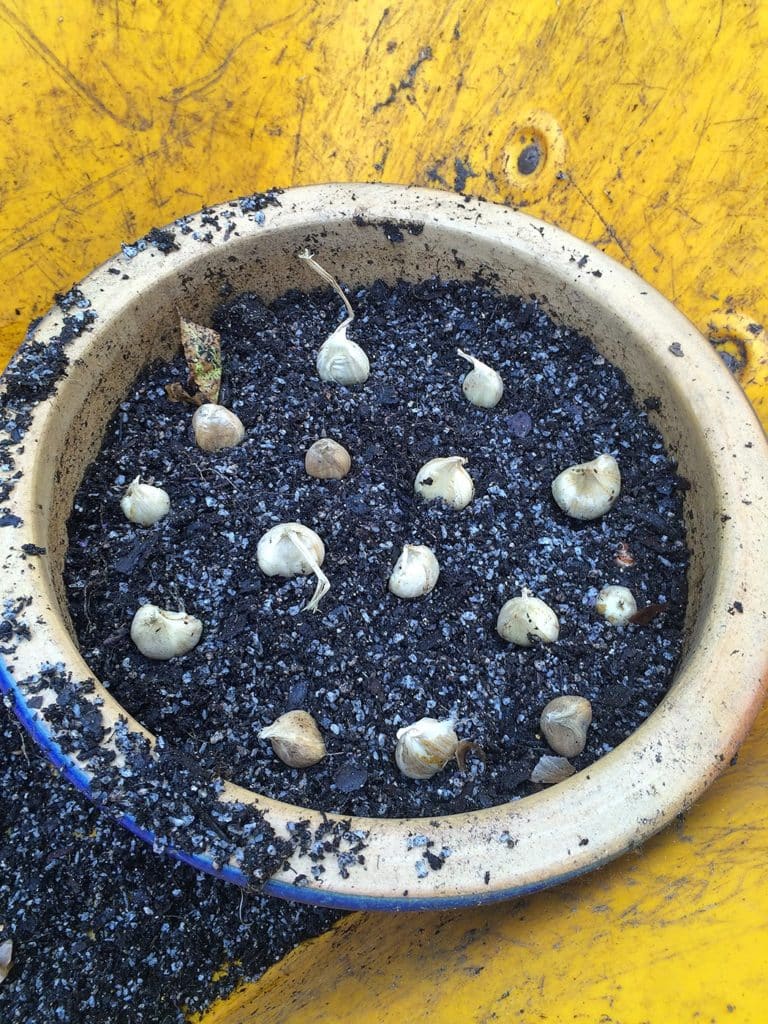 |
| Dwarf irises are on top. These were then covered with potting mix all the way to the rim of the container. |
What I didn’t do was water the container at this point, which is a big departure from what you should do when you’re planting bulbs in the ground. The potting mix was already really moist and I didn’t want the bulbs to get too wet. When I was finished, I just stuck it in our unheated garage sort of in the middle and away from the walls. I have other containers I’ll be storing in the garage for winter so I’ll group them all together and maybe put some bubble wrap or something around them.
I’ll bring out the bulb planter in late winter and give it a good drink and then hopefully the magic will start to happen. If all goes as planned, the irises will bloom first and as they are fading the daffodils will emerge. When those start to fade, the tulips will push through. Don’t worry about all the bulbs being on top of each other: the plants will find their way around them.
If you’re doing this, the key is to store the container in a cool enough spot. Bulbs need a certain amount of cold to bloom, so a basement is probably too warm.
And now comes the tough part: waiting for spring.
5 Responses
I'm now motivated to try this, thanks. Looking forward to seeing yours bloom in the spring! ~Lynne
Me too, Lynne!
I wish when i knew what zone people live in when i read these articles I live in zone 5 snd aftert I planted two pots of bulbs for lasagna style I found out out that daffodils do not do good in my zone plus I am very confused as how to store my pots now with the bulbs!
I've never done this – thanks for the instructions. I'll have to give it a try. I have a ton of bulbs not in the ground yet, so there's no excuse to give this a shot.
Yep! And so much easier than planting them in the ground (not that that is very hard either). You gotta love bulbs; few other things in gardening can bring so much reward for so little work.