Here’s why you need to know how to tie a bowline: Simply put, it is a knot that works when no other knot will, as well as being a knot that will work even if another knot might work better. In other words, if you learn how to tie only one knot, make it a bowline (pronouced bo-lin).
Here are just a few times when a bowline comes in handy:
• Tying something (a Christmas tree, perhaps) to the top of your car, when you need to strap it down tight. Tie a bowline in one end of a line, and put the other end through the loop to give you more purchase to pull against.
• Strapping down something to a trailer or truck bed.
• Makeshift emergency dog collar.
• Towing something.
• Moving a giant hosta.
• Moving a big rock (tie bowlines around it in each direction).
• Connecting almost anything to a line.
• Hanging a basket with a line so you can easily slip it in and out of the loop.
• Tying your trunk closed when you’ve got stuff sticking out of it.
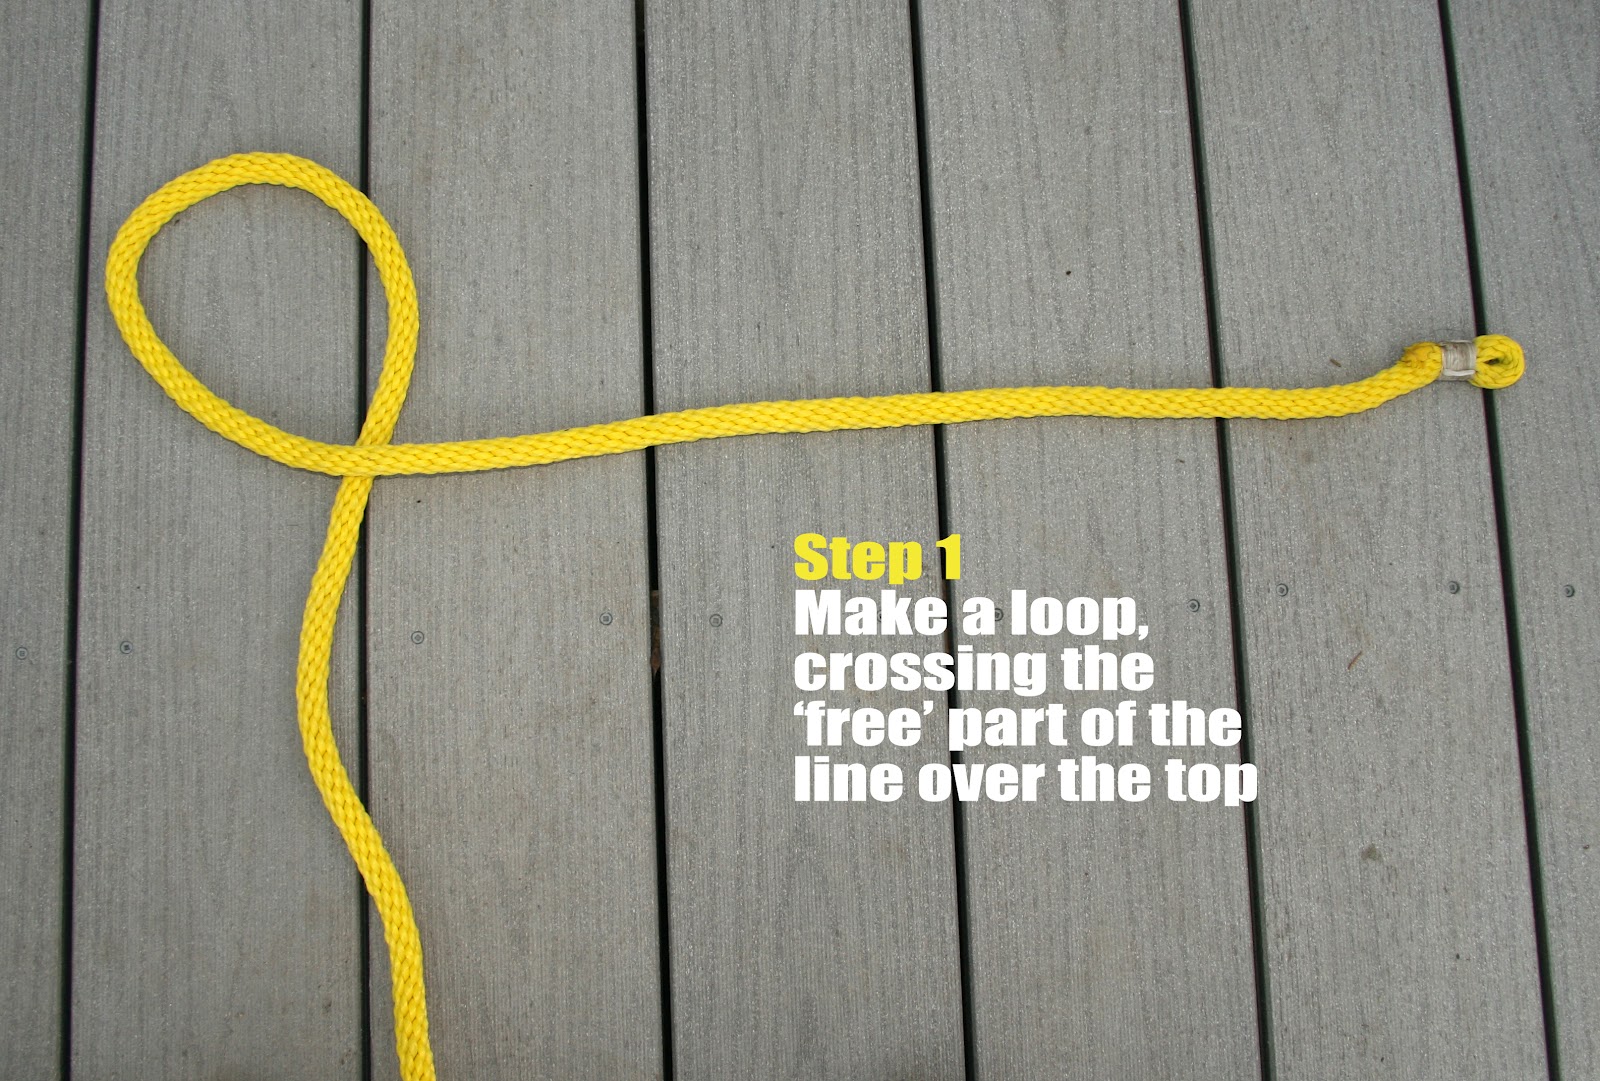
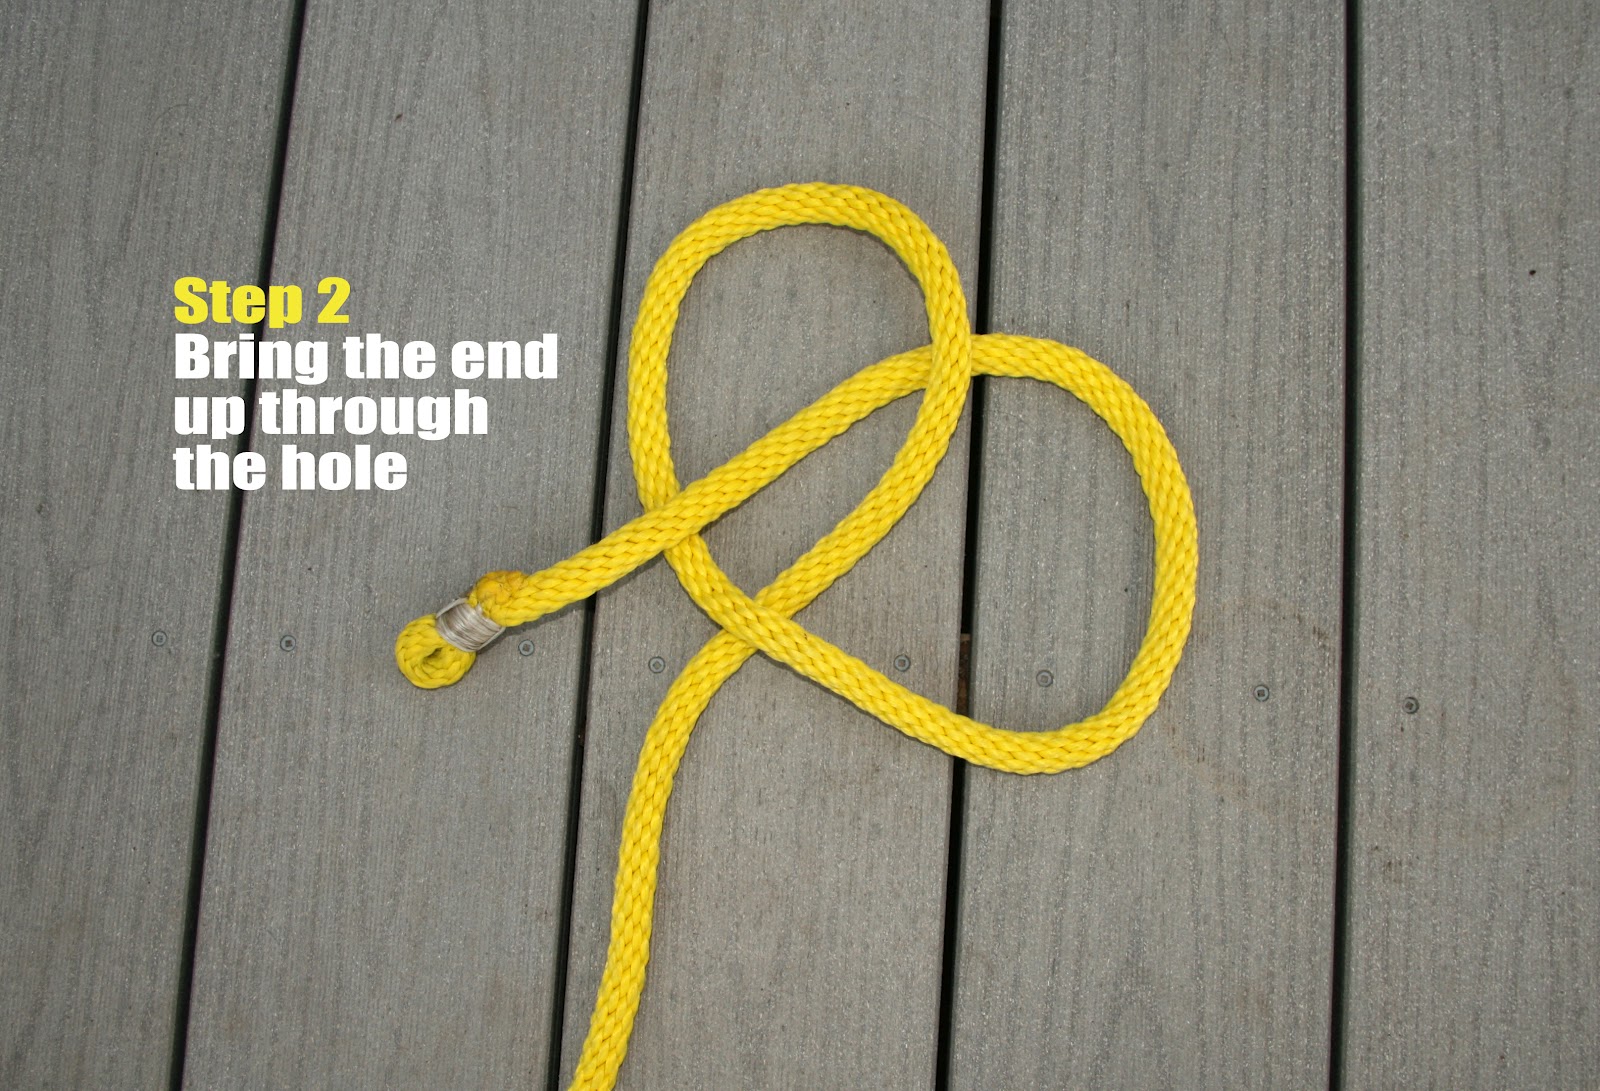
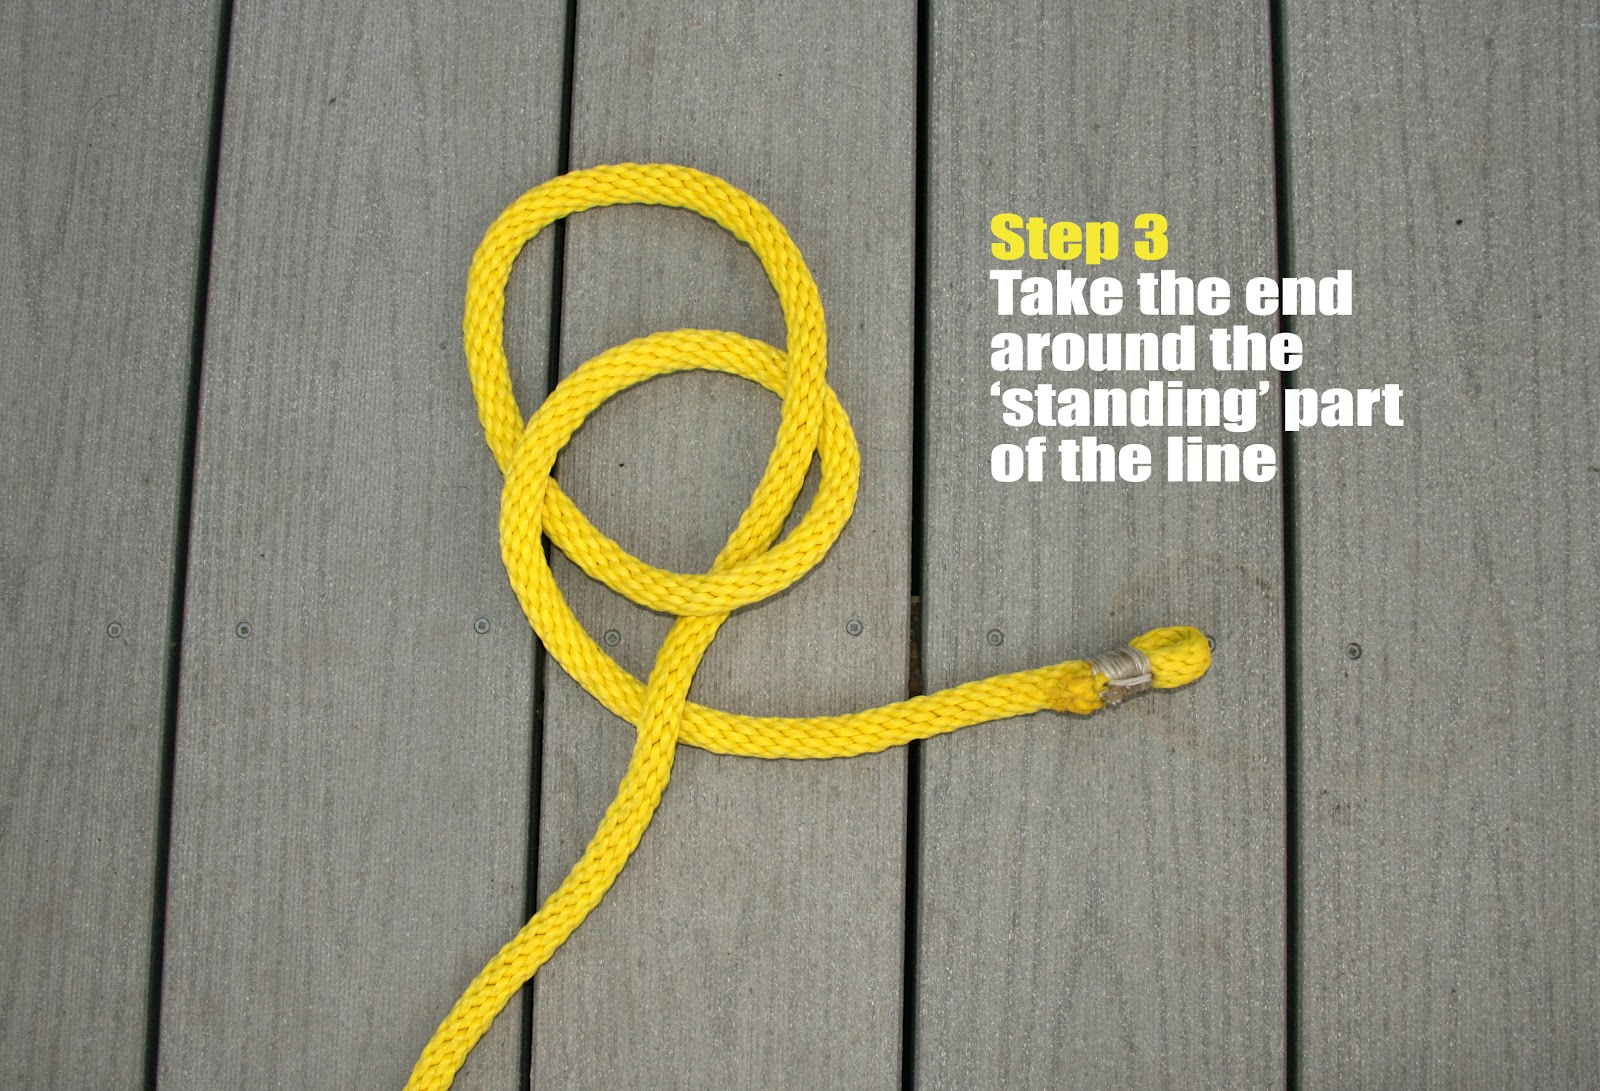
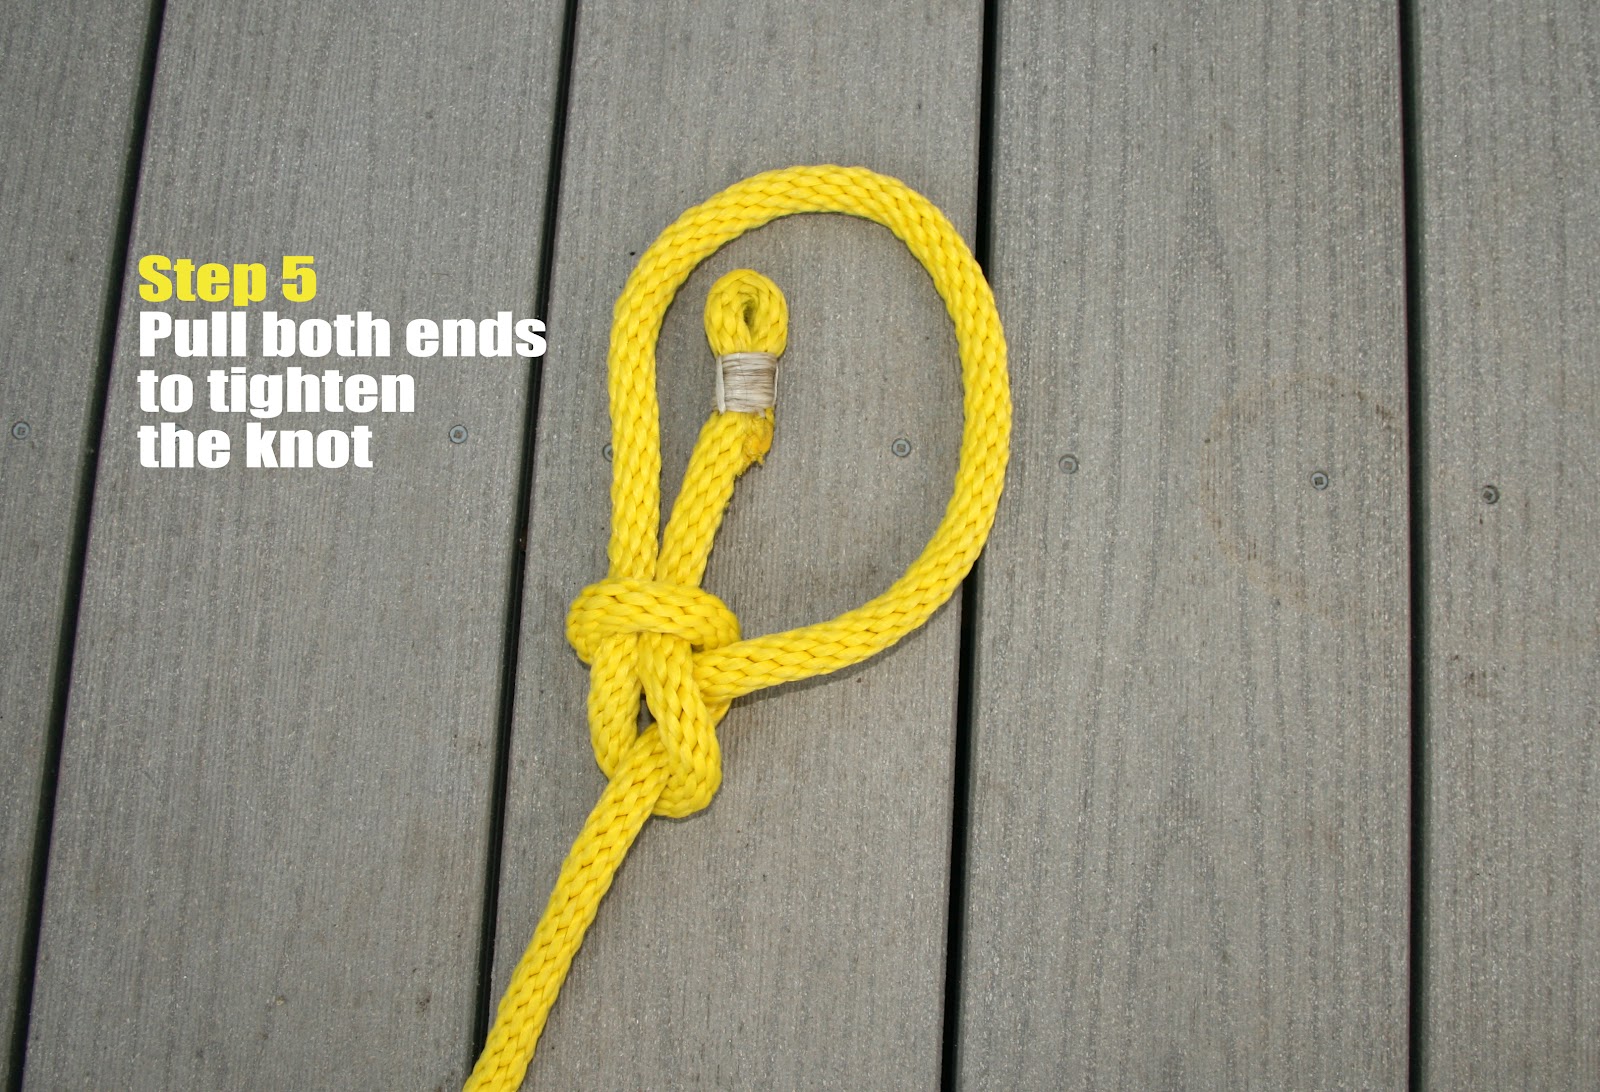
People are often taught to tie a bowline using some weird story about a hole, a rabbit and a tree, and I refer to it in the video. It never helped me much, but it does for some people. Basically the initial loop you make is the hole (you’ll hold this bit in your left hand). The bitter end (held in your right hand) is the rabbit, and the long end of the line is the tree. The rabbit comes up through the hole, around the tree and back down through the hole. Or just watch the video and hopefully it will make more sense.
After the video, I’ll have a photo tutorial as well.
Knots 101: The Bowline from The Impatient Gardener on Vimeo.

OK, now it’s your turn. Grab any kind of line you have (although a little bigger and a length of about 3 feet or so is probably easiest to handle when learning) and start practicing. You can adjust the side of the loop you create either while you’re tying the knot (by starting the initial loop farther back or closer to the bitter end) or at the end by sort of feeding excess line through the knot.
So that’s it! Remember, don’t be the person who follows the adage: If you can’t tie knots, tie lots. Learn how to tie a bowline and you’ll never be left tying 15 overhand knots only to watch them fall apart or having to cut the line in the end because they won’t open up.
Hit me up with any questions you have in the comments!