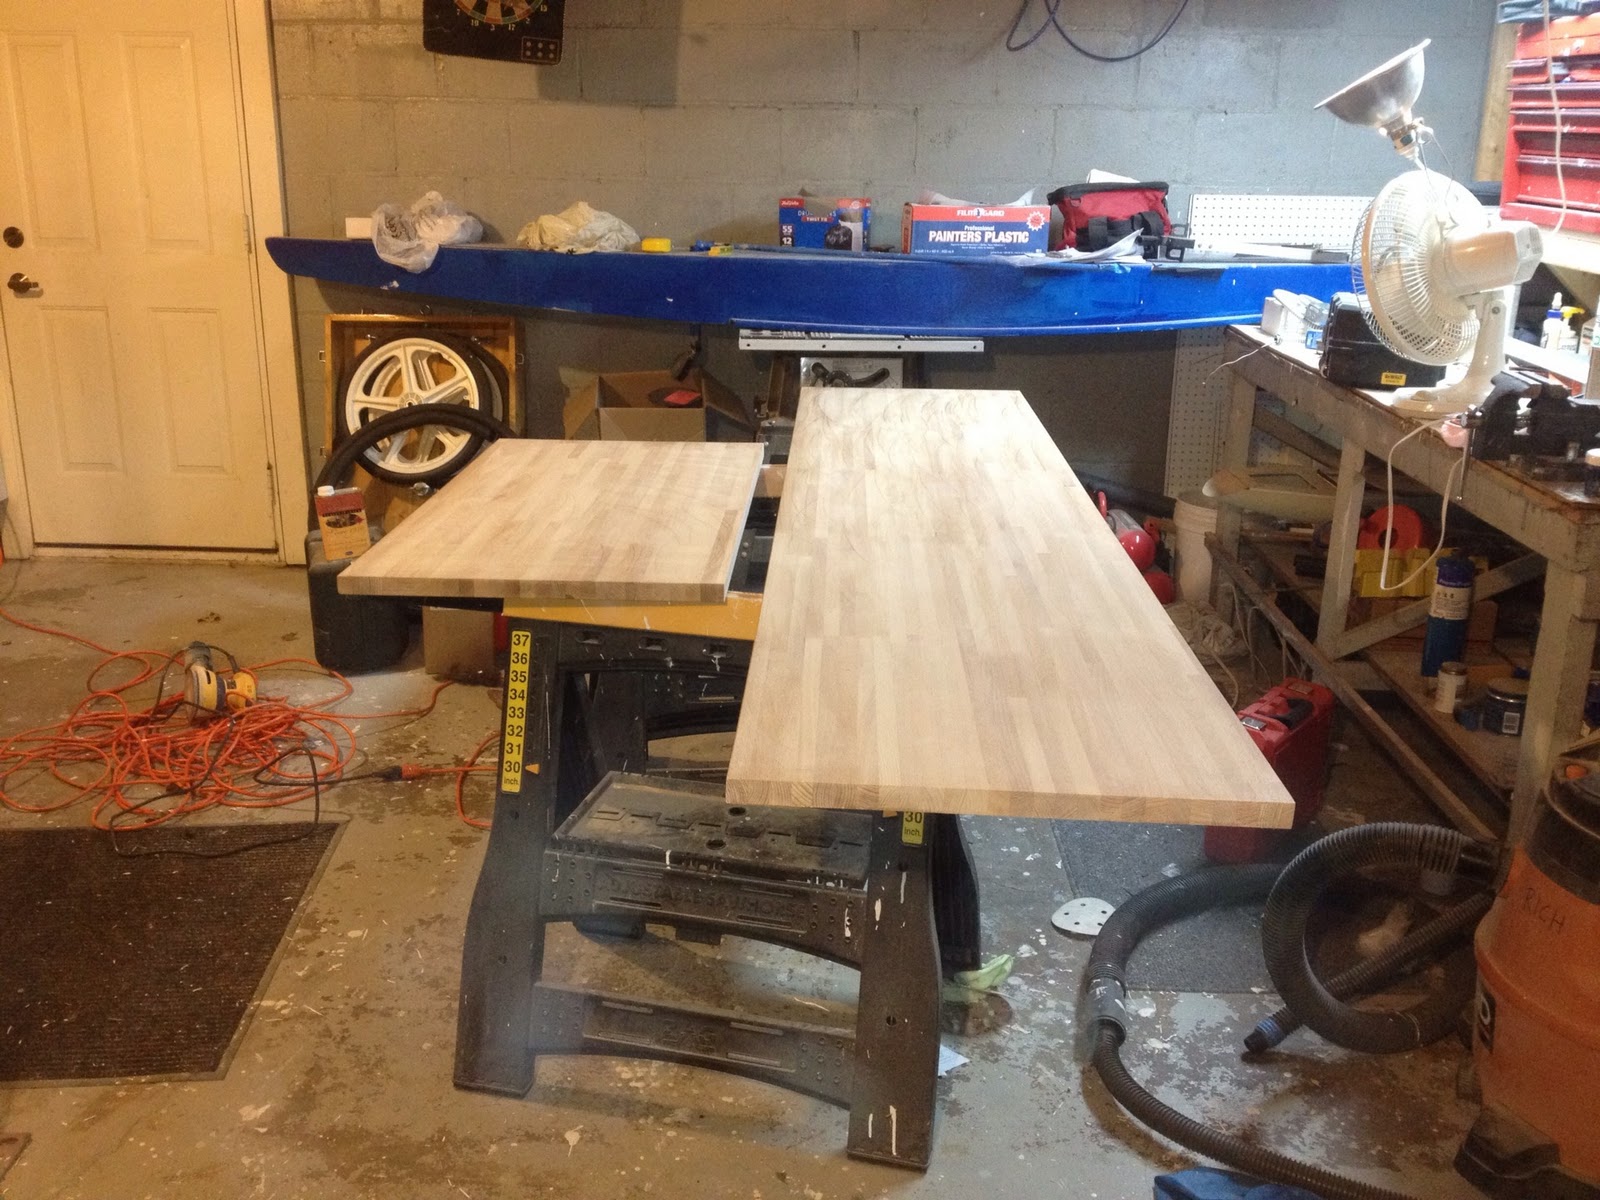
Here’s how they started. These are the Lagan countertops from Ikea which we cut down to size (we’ll have to join the two pieces together so there will be a seam when they are installed). This is also your first look at my lair. Can you believe what a disaster the basement is? I need to stop doing projects just so I can clean the place up. Oh and the blue thing in the back (conveniently serving as a horizontal surface on which to set anything and everything) is an iceboat (you may notice it is the same color as the blue door was originally … leftover paint). The iceboat is sitting on a table saw. Handy, huh?
After I lightly sanded them to remove the factory-applied finish, I applied a wood conditioner and then followed that up with mahogany stain. Here’s what they looked like after I stained the smaller section.

Things were going pretty at this point. The stain was a bit darker than I wanted, but I knew that the Waterlox I was applying next would lighten it up a little.
The next night I applied the first of four coats of Waterlox. From what I read online, it sounded like a lambswool applicator was the way to go. So I bought a cheap one from the hardware store and cut it into sections (it was meant for applying finish to a floor so it was quite large) and I applied coat No. 1 of Waterlox after getting the surface as dust free as possible (I sanded VERY lightly with a 3m sanding pad with 220 grit after each step up to this point just to knock down the raised grain). And this is where the wheels feel off the bus (just like those wheels in the background of the picture).
When I was done doing all three pieces (I’m also working on a desktop at the same time), I took the shop light and looked at the surface to make sure I hadn’t missed any spots and what I saw was horrifying. Bumps all over the place. Bumps caused by lint from the el-cheap fake lambswool applicator which shed all over my counters. Looking back what I probably should have done at that point was remove as much of the Waterlox as I could with mineral spirits. Instead, I opted to let it dry, thinking I could just lightly sand the fuzz out. Now, I had read the Waterlox instructions carefully and it specifically said not to do any sanding of a stained surface with Waterlox on it, but I thought, “Oh, a little light sanding won’t matter.”
Famous last words.
As soon as I started sanding with 220 grit, the finish started coming up, even though I hadn’t sanded all the way through the Waterlox. It’s almost as though the Waterlox absorbs some of the stain or something. Anyway, I ended up with a very blotchy mess. So I made a tough call and decided to start over. Almost.
So last night, I sanded it down. Wanna know what failure looks like? Something like this:


On a promising note, I think I figured out how you make that sort of worn Belgian finish that is so popular. Anyway, I restained last night and I’ll start the Waterlox process over again tonight. It puts me behind schedule, but since I bought the low VOC Waterlox, I think I’ll be able to do a couple coats after it’s installed in the office.
Let’s hope it’s smooth finishing from here on out.
6 Responses
the ikea countertops are are stamped "this side down" on one side, so you can't flip.
Mine weren't, actually. Plus, since I was staining them I could have just sanded off the stamp and stained from there. Maybe they changed the countertops since I bought mine.
You poor thing!!! I did chuckle a bit at the "On a promising note" Can't wait to see it all done!
Linda can you believe this? Until we were moving it out of the house today to fit it in at the office and I saw the virgin underside, it never even occurred to me to flip it over. I could just kick myself. That would have been the perfect solution and I have no idea why I didn't think of it (perhaps the fumes are getting to me finally). I actually brought it up as we were loading it in the van and Rich brought up the good point that we'd be hard pressed to get it installed before he left for Australia again if I started from scratch now. I still wish I would have done that, but I think it'll end up OK in the end. I'm so angry at myself for not thinking of that though.
I am assuming you couldn't just flip it over? I think it is helpful for all of us to realize that these projects rarely go as smoothly as we make it sound or look. If it was all that easy everyone would be doing it themselves which is not the case. You take on serious projects and they can be tough, but you do learn from them and wind up with some great finished work.
Thanks for sharing!! Live and learn….I'm so glad you posted this. We've been considering buying butcher block for our kitchen island and I would want it stained dark like yours. I was drooling when I saw the pic of your one piece finished!! I'm sure it will turn out great!