Since I’ve done almost no decorating this year, haven’t wrapped a single gift or baked a single cookie (yet), I’m lacking in the holiday post department. But that’s doesn’t mean I don’t have a little gift for you. Because I do: An awesome idea for a super cool, great looking and inexpensive floor.
 |
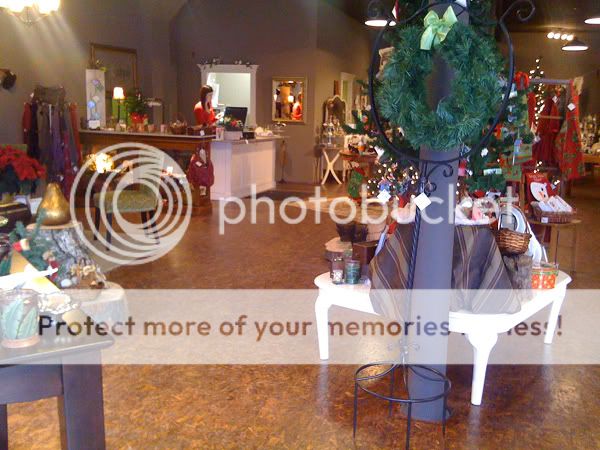
This floor can be found in a great new shop that recently opened in my hometown. It’s full of super cute stuff and it’s just a lovely space. But what caught my eye from the beginning was the really cool floor. And that’s when I took a closer look and realized it was …
Oriented Strand Board (kind of like plywood, but made with small wood strips all mushed together with wax and resin).
I know, can you believe it?
One of the owners told me the story: As they were fixing up the space (which had been an antiques store, appliance store and a bunch of other things in its past life) they realized it would be very expensive and time-consuming to try to rip up the layers of flooring to get to the original wood floor in the old building. Looking for an inexpensive solution for this large space, they came up with the idea to use OSB. They figured they had little to use: If it didn’t work, well then they had a great subfloor all set for whatever they decided to do on top of it.
 |
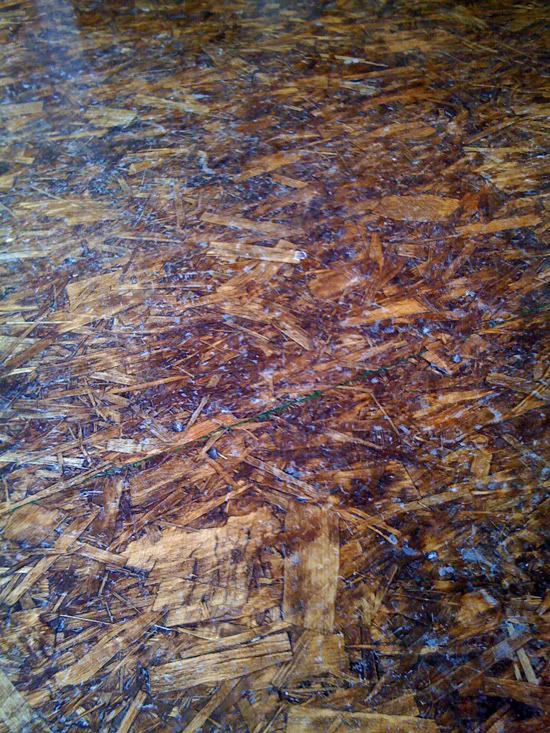
| The only way you can spot the seam in this photo is because some of the green paint that comes on the edges of sheets of OSB is left. If it weren’t there I bet you’d never spot it. |
They set the OSB sheets down on the floor and kept the joints super tight (I can’t remember if they offset the seams or not, to be honest but I think you could do whatever you wanted), and nailed them down as you would with any subfloor. The trick is to line the joints up really carefully to keep them tight. I think if you wanted to get really picky about it you could use wood filler or caulk to fill them but really, the OSB is so busy that it hides a lot of evils.
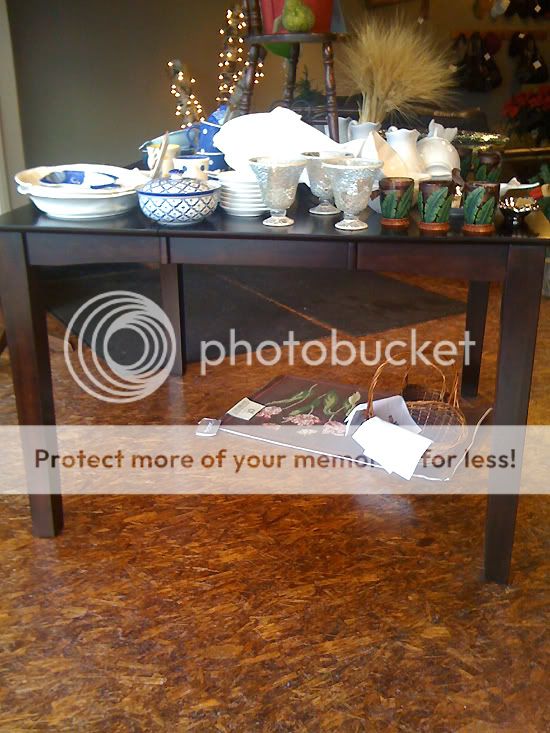
Then they rented a floor sander and sanded it all twice: With 30-grit and then 60-grit sandpaper. Then they applied stain just like you would with any wood floor. What I love about the floor is how the stain sticks to different orientations of the strands in different densities. Then they followed it all up with three coats of polyurethane.
 |
I think this floor is brilliant. It looks great and was inexpensive. And in the midst of this beautiful store, with it’s charming displays, fun products and wonderful windows, wanna guess what I’m told gets the most reaction? You guessed it: The floors.
What do you think? Would you ever try something like this in your house? I’m wondering if you could do something like this below grade because I think this could be a perfect flooring solution for the finished part of our basement.
P.S. Sorry for the cell phone pictures on these. I thought it would be too weird to take the camera in the store and start snapping photos of the floor.
What would you like to know? Search, or jump to categories below.
14 Responses
Very interesting!
great floor and great looking store. Happy Christmas!
Just dropping by to wish you a wonderful Holiday, Erin!!!!
I seriously want to do this in my house! Our carpet is so cheap and looks horrible, but new carpet is so expensive! I think this is the perfect solution!
Did anyone try this at home? I think we are. Curious about any tips!
I love it! I've been thinking about plywood floors for our house but this is probably cheaper. love the stained look too.
I did this to my basement floor 18 years ago. The ONLY point of caution is that if you are doing this on a basement floor, DO NOT fill in the small spaces between the floor panels with wood glue or wood shavings, etc. after they are glued to the floor. I did this and I thought it looked great – but in the summer, there was not place for moisture to escape and I had a panel pop up off the floor. We just nailed it back in. Leave the slight space to avoid this. I added 2 coats of Early American stain and 4 coats of clear polyurethane. Today you can use latex polyacrylic – easier than oil based and wears well.
It looks fabulous still – interested colour highlights as mentioned, inexpensive and gives the warm feeling of wood floors. The big bonus is you don't have to be careful with your floor. I am planning to sand lightly and recoat with a couple of coats satin polyacrylic to update them.
How did you get the blue appearance in the original pic?
Hmmm, not really sure what you’re seeing. That’s just how the floor looked, but there was no blue hue to it that I recall.
Yep, I’m seeing the blue also, in the first pic. (Close up shot)
Super nice looking floor. Wanted to this to my son’s bedroom floor many years ago, but, my husband thought it was a terrible idea. I will show this to him so he sees how cool looking it is.
I have actually seen this type of flooring in a house or two and plan to install it in my own house. According to one homeowner I know who has it, you must put a new layer of varithane annually to maintain the finish or it wears down. As for the green edge visible at the seam, I believe they solved this by sanding the OSB before installing it.
I would caution against using OSB as flooring. It is not designed to be used as finished flooring. It is designed as sub-flooring for a reason. It’s made from wood chips that are pressed/glued together. It will chip easily after heavy use and be a hazard to bare feet, children and pets.
Thanks for this article. I watched a YouTube video where a couple had this on there floor in a garage that was turned into a very nice looking home and walking bare footed on it. I didn’t realize that it was OSB, and I liked it a lot. They said that they used it in their prior large home years ago because they didn’t know what they wanted to do for flooring. After seeing how nice it looked after it was laid and still looking good over the years with no problems whatsoever, they decided not to cover it. I’m about to get my foundation repaired in my 483 square feet addition which is living space, and don’t have money for flooring. It would be best to wait anyway to make sure the repair is done properly to avoid having to damage my floors again and waste money. Therefore, I would rather use this as flooring instead of sleeping in a room with bare concrete or carpet. Sand it, stain it, and varnish it, I can have nice looking flooring until I can purchase wood floors. God Bless!